February Stampin’ Up! Roundup
Happy February! There’s so much Stampin’ Up!® fun happening this month, and I wanted to make it easy for you to find everything in one place. Take a little stroll through my post and click on anything that inspires you — clicking on the graphics will take you right where you need to go!

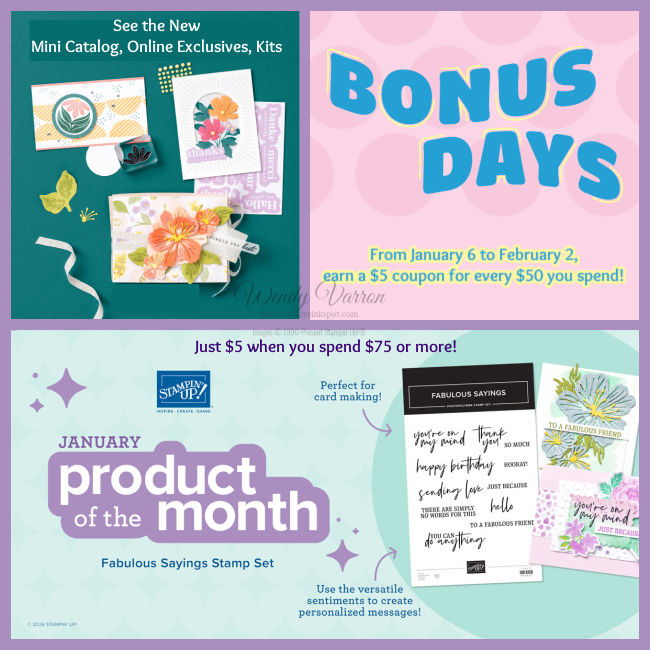
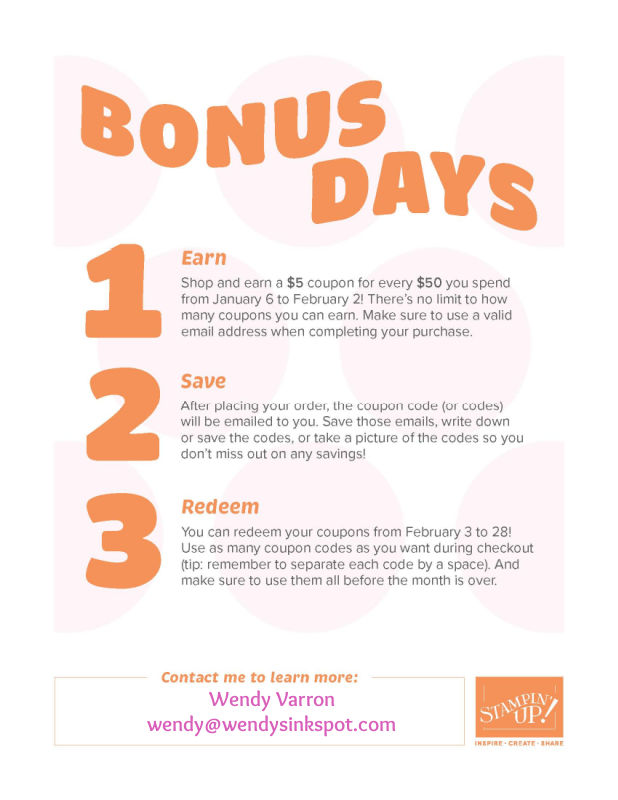
Did you earn Bonus Days coupons in January?
Now’s the time to use them! Redeem your $5 coupons through February 28 and use as many as you want in one order. Use as many coupons as you want in one order.
Quick tip: If you’re using multiple coupons, be sure to separate each code with a space at checkout so they all apply correctly.
Clearance lovers — this one’s for you!
Stampin’ Up! has refreshed the Last Chance Products and Clearance Rack, and new items have been added. This is your opportunity to shop retiring and past-season favorites before they’re gone for good.
Don’t wait — quantities are limited and popular items are sure to sell out quickly.


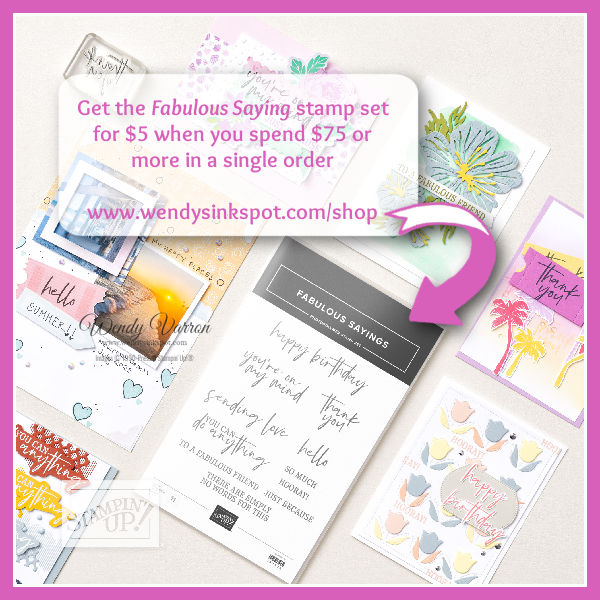
Meet February’s Product of the Month
Painted Illusions Designer Series Paper
When you spend $75 or more on a single order, you can ADD the Product of the Month (POTM) Painted Illusions Designer Series Paper to your order for only $5! This beautiful Designer Series Paper coordinates with Stampin’ Up! colors Darling Duckling, Flirty Flamingo, Granny Apple Green, Lost Lagoon, Misty Moonlight, Petal Pink, and Pretty Peacock.
Stampin’ Up! has introduced two brand-new kits this month!
Best Ever Kit – This versatile kit is great for Mother’s Day, Father’s Day, birthdays, and more. Create 6 different card designs (1 of each), plus coordinating printed envelopes.
Happy Happenings Kit – Perfect for welcoming a new baby, celebrating a wedding, or saying thank you. This kit includes supplies to make 9 cards (3 each of 3 designs), with coordinating printed envelopes.


Lovely Blossoms Craft Class Is Now Available!
Create beautiful projects, learn new tips and techniques, and explore fresh crafting ideas with this virtual class led by a Stampin’ Up! product expert.
Be sure to add the Lovely Blossoms Suite products to your order so you’re ready to craft along
Thinking about joining Stampin’ Up!? Now is the time!
When you join February 3–March 2, you’ll enjoy a discount on your shopping and receive the new Stampin’ Positioner tool FREE with your Starter Kit.
Plus, you’ll become part of a fun, supportive crafting community full of inspiration, creativity, and connection. If joining has been on your mind, this is the perfect time to say yes!

I hope this February round-up makes it easy to see what’s new and exciting this month. Let me know if you have any questions — I’m always happy to help!
Happy Stamping!

Want to leave me a comment? Please Click Here

**Subscribe to my Customer Newsletter
**Shop the Last Chance Products List – Click Here
**Join my Ink, Stamp & Share Team of Demonstrators – click for info


![Beautiful Blues Kit (English) [ 165658 ]](https://assets1.tamsnetwork.com/images/EC042017NF/165658s.jpg "Beautiful Blues Kit (English) [ 165658 ]")
![Secret Sea 8 1/2" X 11" Cardstock [ 165624 ]](https://assets1.tamsnetwork.com/images/EC042017NF/165624s.jpg "Secret Sea 8 1/2\" X 11\" Cardstock [ 165624 ]")
![Basic White 8 1/2" X 11" Cardstock [ 166780 ]](https://assets1.tamsnetwork.com/images/EC042017NF/166780s.jpg "Basic White 8 1/2\" X 11\" Cardstock [ 166780 ]")
![Night Of Navy Classic Stampin' Pad [ 147110 ]](https://assets1.tamsnetwork.com/images/EC042017NF/147110s.jpg "Night Of Navy Classic Stampin' Pad [ 147110 ]")
![Paper Trimmer [ 152392 ]](https://assets1.tamsnetwork.com/images/EC042017NF/152392s.jpg "Paper Trimmer [ 152392 ]")
![Multipurpose Liquid Glue [ 110755 ]](https://assets1.tamsnetwork.com/images/EC042017NF/110755s.jpg "Multipurpose Liquid Glue [ 110755 ]")
![Stampin' Dimensionals [ 104430 ]](https://assets1.tamsnetwork.com/images/EC042017NF/104430s.jpg "Stampin' Dimensionals [ 104430 ]")