If you’re looking for the perfect stamp and punch combo, here it is! The Let’s Set Sail Bundle includes the Let’s Set Sail Stamp Set and the Sailboat Punch—the perfect pair for creating so many different types of projects!
I’m a huge fan of punches because they’re easy to use, they’re portable, and they don’t take much storage space. It’s so simple to stamp a sailboat and then punch it out. Fun tip: You can also use the larger water image as a cloud!
I love the versatility of this bundle, your not limited to sailing-based projects. The sentiments in the stamp set open up lots of possibilities! Create cards for birthdays, graduations, and other celebrations. Make a card for someone who’s embarking on a new adventure. Add a Father’s Day sentiment from another set to create a Father’s Day card your guy will love. Its a set you can use all year long!
Watch the short video below see some ideas for creating this this great bundle.
Looking for more inspiration? Here are a few other projects created with the versatile bundle.
If you’re ready to sail away on a new crafting adventure, choose this bundle! When you purchase the Let’s Set Sail Bundle get 10% off with bundled savings! If you’d like to learn more about this pair of products or place an order, let me know! I’d be happy to help you.
The inspiration for this piggy card came from Michelle Wilder, who presented 3 projects using the super cute This Birthday Piggy stamp set, at a Luv 2 Stamp Group Team event last weekend. Thanks Michelle for the inspiration!
I die cut a square with the Stylish Shapes Dies. Next I stamped the piggy image in Tuxedo Black memento Ink, and colored in the image with Stampin Blends. Then I stamped a few butterflies in Orchid Oasis and Tahitian Tide and added a few of the In Color Matte Decorative Dots. I adhered the square to the card base with Stampin’ Dimensionals.
I stamped the sentiment in Orchid Oasis and die cut it with the Decorative Labels Dies, adhered it to the bottom of the square with a Mini Glue Dot and a Stampin’ Dimensional. To finish I tied a bow with the In Color Bakers Twine to label.
This Birthday Piggy Thinking of You Card Measurements:
2022 – 2024 In Color DSP Assortment: 3 strips cut to 1-1/2″ x 4-1/4″
Basic White Cardstock Scrap to die cut Square and Label
I’d love to be your Stampin’ Up!® Demonstrator! All the Stampin’ Up! supplies used to make my card are available in my online store. Simply click any of the product photos below!
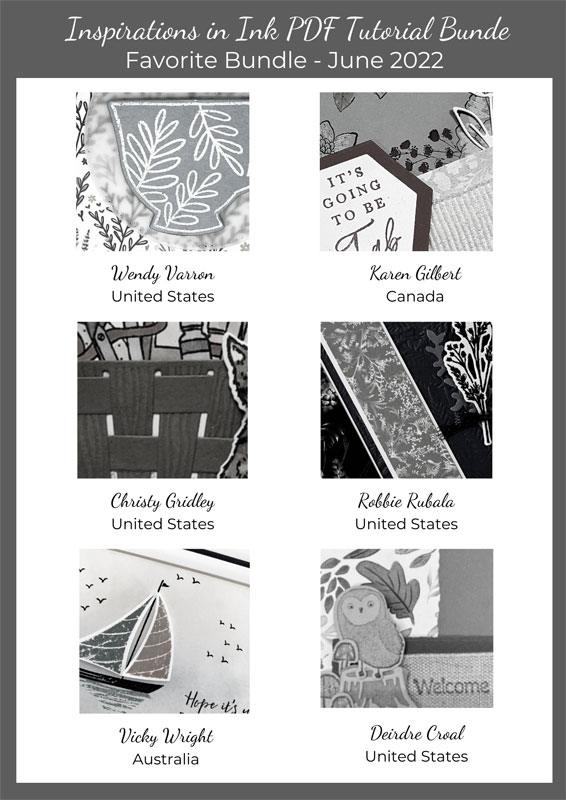
The Inspirations In Ink Team has a new Tutorial Bundle! This month our focus was on our Favorite New Bundle in the Annual Catalog. We’ve put together 6 tutorials with 6 different Bundles. Here’s a sneak peek.
How to obtain your copy FREE from me
Receive a copy of this Bundle for FREE when you purchase $35 or more through my online store using my June Host Code: EGB94HNH
Receive as a FREE Gift from me monthly when you purchase the Starter Kit and become a Team Member of mine.
Does my card look familiar? I CASED a card in the Stampin’ Up! Annual Catalog for inspiration and slightly changed the label. Case-ing means Copy And Share Everything, and is a great source for inspiration. The cards made with the Hues of Happiness Suite catch my eye every time I’m looking through the catalog. This pretty card was quick to make and is perfect for any occasion.
I started with a piece of Fresh Freesia card stock for the card base. I trimmed and adhered a piece of the Hues of Happiness DSP to add to the base.
Using Stylish Shapes dies I die cut a Granny Apple Green Label. Then I cut a piece of the Hues of Happiness DSP to 3/4’x 3″ and punched one end with the Banners Pick A Punch and adhered it to the Granny Apple Green label. I trimmed the end of the Granny Apple Green Label so it would be flush with the end of the card. Then I cut a piece of Basic White Cardstock to 3/4″ x 2-1/4″ and stamped the sentiment in Gorgeous Grape and adhered it to the label.
I used Stampin’ Dimensionals to add the label to the card. I added a little sparkle with a few Gorgeous Grape Glassy Dots to finish my card.
Hues of Happiness You Are Wonderful Card Measurements:
Fresh Freesia Card base: 5-1/2″ x 8-1/2″, score at 4-1/4″
Hues of Happiness DSP: 3-3/4″ x 5-1/2″
Hues of Happiness DSP Strip for Label: 3/4″ x 3″
Basic White Cardstock for Label: 3/4″x 2-1/4″
I’d love to be your Stampin’ Up!® Demonstrator. All the Stampin’ Up! supplies used to make my card are available in my online store. Simply click any of the product photos below!
Welcome to the Luv 2 Stamp Group Blog Hop! We hope you enjoy our Father’s Day Theme!
Welcome to the Luv 2 Stamp Group’s 2022 Blog Hop! We are excited to share projects with you again this year. We hope to inspire you to create beautiful new projects. Each month we will have a different theme based on the next month’s celebrations using Stampin’ Up! products. This month our Theme is Father’s Day.
Once you are done with each post, scroll down to the bottom and you will see a list of Blog Hop participants, you can click on their name to go to their post, or you can click the next button to go to the next post in line. Happy crafting!
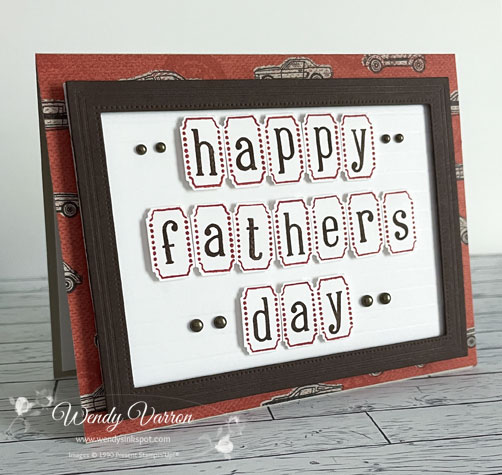
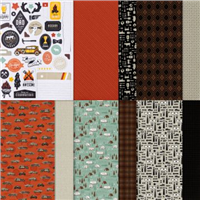
My Father’s Day card features the Alphabest Bundle. It’s a great stamp set for creating that perfect sentiment. I wanted this Father’s Day card to have the look of a message board.
To create this fun and quick card, I started with a piece Sahara Sand cardstock for the cardbase. I cut a piece of He’s the Man DSP and adhered to the cardbase.
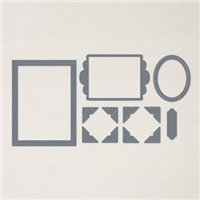
To create the message board I scored a piece of Basic White Cardstock on the short side every 1/4″. Next, I used the Fabulous Frames Dies and Early Espresso cardstock to create the frame for the message board. I used Stampin Dimensionals to adhere the frame to the Basic White cardstock, then trimmed it to the size of the frame. To give it a little more stability before adding the letters, I cut a piece of Foam Adhesive sheet and attached it to the back of the Basic White cardstock.
I stamped the letters in Early Espresso and Cajun Craze and punched them out with the Best Label punch. Using a bone folder I gently cured the ends of the letters and attached them with Stampin’ Dimensionals. I also added a few Rustic Metallic Adhesive Backed Dots. Then I peeled the backing off of the Foam Adhesive sheet to attach it to the cardbase.
On the inside of the card I added a piece of Basic White Cardstock and stamped this fun image from the He’s All That stamp set. I used a piece of Masking Paper to cover up part of the sentiment before stamping it. I’m so happy that Stampin’ Up! added Masking Paper to the tools in the new Annual Catalog! I will definitely be using it a lot.
Alphabest Stamp Case Tip:
I shared this tip on Instagram and thought it was worth sharing here for everyone. The graphic in the stamp case is confusing for me. I was mixing up some of the letters and numbers.
To fix this, I cut a shipping label to 5″ x 6-7/8″. I put as many of the stamps as I could fit, in the order that I wanted, on the largest clear block and stamped the label. Put the few remaining stamps on a clear block and stamped them.
Then with the backing still on the label slipped it into the case over the graphic of chaos. When I put the stamps in the case they are backward but it’s much easier for me to find the letter or number I’m looking for.
I hope you enjoyed my project and the Tip for the Alphabest stamp case today! For more inspiration from the Luv 2 Stamp Group Blog Hop Team, click on the image below to visit the talented Patty Bennett! Don’t forget to continue following links on each blog to see everyone’s projects!
Sahara Sand Cardbase: 5-1/2″ x 8-1/2″, score at 4-1/4″
He’s The Man DSP: 4-1/4″ x 5-1/2″
Basic White Cardstock: 4″ x 5-1/4″, score on the short side at 1/4″, 1/2″, 3/4″, 1′, 1-1/4″, 1-1/2″, 1-3/4″, 2″, 2-1/4″, 2-1/2″, 2-3/4″, 3″, 3-1/4″, 3-1/2″, 3-3/4″
Basic White Cardstock (inside): 4″ x 5-1/4″
I’d love to be your Stampin’ Up!® Demonstrator. All the Stampin’ Up! supplies used to make my card are available in my online store. Simply click any of the product photos below!
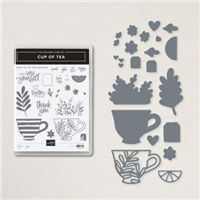
The Cup of Tea Bundle is one of my favorite Bundles n the new Annual Catalog! As a lover of Tea this was at the top of my shopping list!
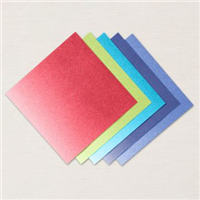
My card also features the 2022-2024 In Color 6’x6″ Glimmer Paper. If you haven’t tried it, Glimmer Paper is amazing! I love the shimmer it adds to my projects and its mess free! No traces of glitter all over my craft room!
To create this card I cut (2) 1/2″x 5-1/2″ strips of Starry Sky Glimmer Paper, and (2) 1/2″x5-1/2″ Parakeet Party Glimmer Paper. I adhered them to the Basic White cardbase with Multipurpose Liquid Glue.
I die cut a stitched circle in Vellum with the Stylish Shapes Dies. Using Tear & Tape I added a strip of White glittered Organdy Ribbon. I added another strip of Tear & Tape over the ribbon to add it to my cardbase.
Then using an Adhesive Sheet added to the back of some Parakeet Party Glimmer Paper, I die cut the leaf tea cup. I die cut the sold Tea Cup in Starry Sky Glimmer Paper. This made adding the Parakeet Party Tea Cup to the Starry Sky tea cup super quick and easy. I attached the tea cup to the Vellum Circle with Foam Adhesive Sheet cut to fit the cup.
To finish my card, I stamped 2 tea tags in Starry Sky and Parakeet Party and die cut them. I tied some Basic White Bakers Twine to my card and left 2 long tales at the top. Using Glue dots I attached the tags to them. I added these cute die cut hearts to the back of the tags with another glue dot.
Cup of Tea with Glimmer Card Measurements:
Basic White Thick Cardstock Base: 5-1/2″ x 8-1/2″, score in half at 4-1/4″
Starry Sky Glimmer Paper Strip: (2) 1/2″ x 5-1/2″
Parakeet Party Glimmer Paper Strip: (2) 1/2″ x 5-1/2″
I’d love to be your Stampin’ Up!® Demonstrator. All the Stampin’ Up! supplies used to make my card are available in my online store. Simply click any of the product photos below!