
Eden’s Garden – Dear Friend
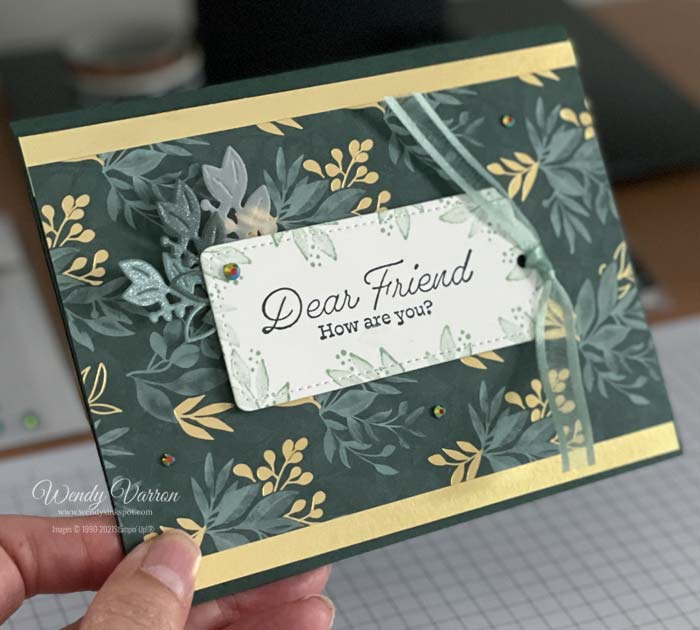
This pretty card was created with the Eden’s Garden Collection. I love the shades of green and the gold foil accents in the Ever Eden Designer Series Paper. It coordinates perfectly with the Soft Succulent & Evening Evergreen sheets of the 2021-2023 In Color Shimmer Vellum, and the Soft Succulent & Evening Evergreen Open Weave Ribbons. That’s one of the things I love about Stampin’ Up! products, the perfect color coordination across all their products. Color coordination makes me happy!
Creating the Card

To create the layers of my card I started with a piece Evening Evergreen cardstock for the base of my card. Then I cut a piece of the Ever Eden DSP to 3-1/2″ x 5-1/2, and 2 strips of Gold Foil Specialty Paper to 1/2″ x 5-1/2″. I adhered the DSP to the Gold Foil on the long edges and attached the DSP to the cardbase. You can see, in the image above,I cut the Gold Foil a touch longer than 5-1/2″. Not to worry, I just snipped the ends off with my Paper Snips.

The label was die cut with the Tailor Made Tags on Basic White cardstock. Using the Eden’s Garden Stamp set, I stamped the leaves in Soft Succulent around the edges of the tag. Next, I stamped the sentiment in Evening Evergreen. I die cut a few of the leaf stems from the Eden Dies in Vellum and the Soft Succulent and Evening Evergreen Shimmer Vellum. I attached them to the bottom of the label using a few glue dots. I tied a piece of the Soft Succulent Open Weave Ribbon before attaching the label to my card with some Stampin’ Dimensionals.

To finish my card I added a few of the Garden Gems. I’m sure by now you know I can’t resist adding a bit of bling whenever I can. I love the look of this card. I hope you do as well, leave a comment below and let me know what you think of my card.
Eden’s Garden Dear Friend Card Measurements
- Evening Evergreen Cardstock card base: 5-1/2″ x 8-1/2″, score in half at 4-1/4″
- Ever Eden DSP: 3-1/2″ x5-1/2″
- Gold Foil Specialty Paper: (2) 1/2″ x 5-1/2″
I’d love to be your Stampin’ Up! Demonstrator. All the Stampin’ Up! supplies used to make my card are available in my online store. Simply click any of the product photos below!
Happy Stamping!


")


