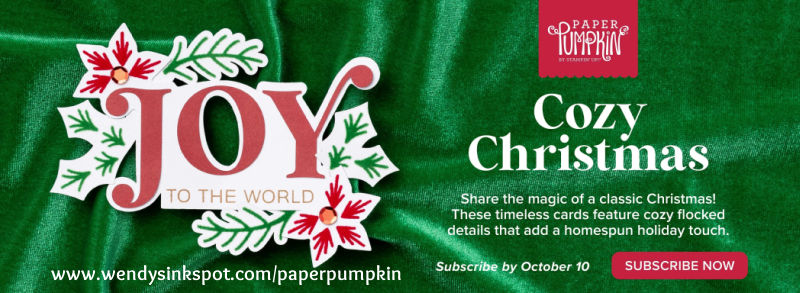
Tiny Treats, Big Cheer: November’s Paper Pumpkin Kit
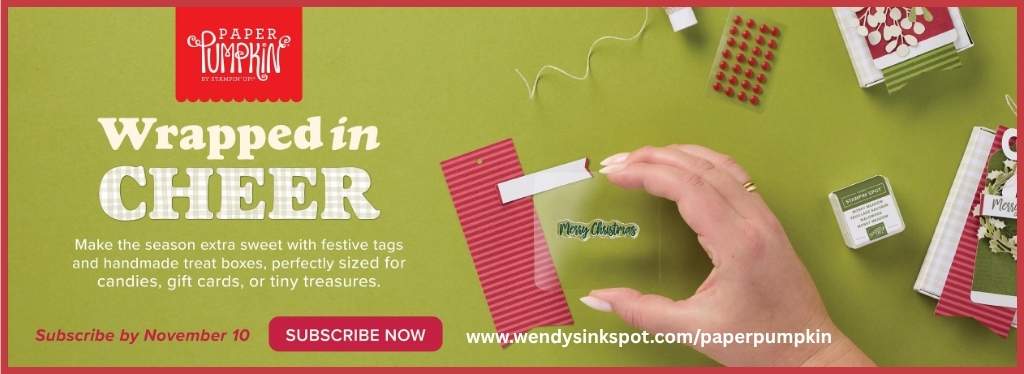
The holidays are just around the corner, and the November Paper Pumpkin Kit – Wrapped in Cheer is ready to help you make the season a little sweeter! This kit makes it easy to create festive little treat boxes and coordinating tags that are just the right size for gift cards, candies, or small surprises. With classic Christmas colors, delicate greenery accents, and a touch of texture, each project brings a cozy, heartfelt feel to your holiday gifting.
Wrapped in Cheer Kit Contents:
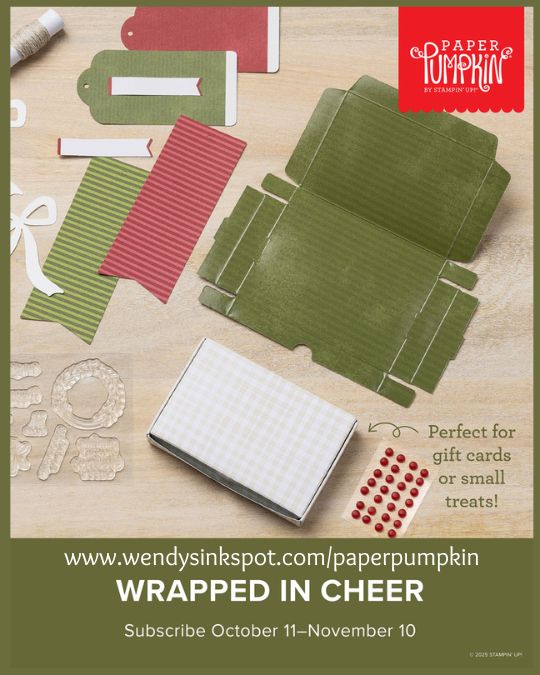
Craft festive goody boxes perfect for holding gift cards or small treats!
- Makes 8 projects: 4 each of 2 tag designs with 8 identical coordinating boxes
- Exclusive Wrapped in Cheer photopolymer stamp set
- Foldable box bases
- Delicate Greenery Pieces with double sided printing.
- Linen Thread and red dot embellishments
- Mossy Meadow Classic Stampin’ Spot
Coordinating Kit Colors
The subscription period for the November Wrapped in Cheer kit is October 11 – November 10, 2025. Click the button below to subscribe!
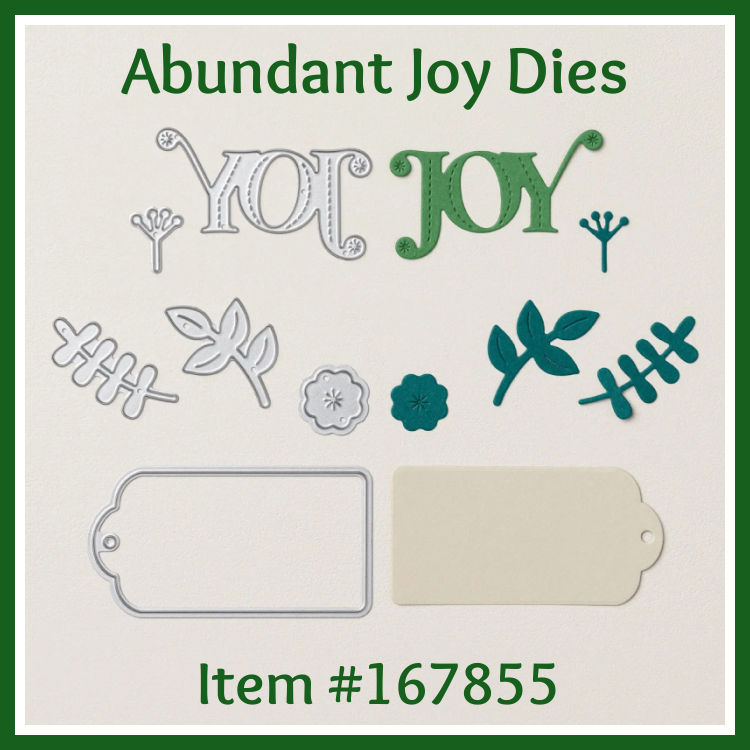
Abundant Joy Coordinating Dies
The Abundant Joy Dies Add-On makes it easy to cut tags, florals, greenery, and “Joy” accents to dress up your projects. Designed to coordinate with Cozy Christmas, Wrapped in Cheer, and Watercolor in Bloom Paper Pumpkin kits, these versatile dies also mix perfectly with your other Stampin’ Up! supplies.
DETAILS
6 dies
– Largest die: 2-7/8″ x 1-1/2″ (7.3 x 3.8 cm)
Note: You must be a current Paper Pumpkin subscriber to purchase this item. Available while supplies last.
Pre-Paid Subscriptions Also Available
Did you know? Stampin’Up! also offers Prepaid 3 month, 6 month or 12 month Subscriptions which allow you to pay ahead or give as a gift. Just click the image below for the prepaid subscription of your choice.
Happy Stamping!

Want to leave a comment, Please Click Here