Customer Thank You

March Customer Thank You Cards

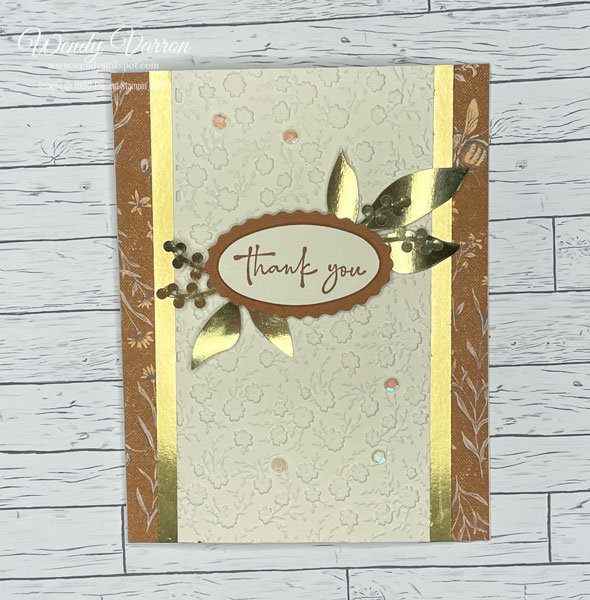
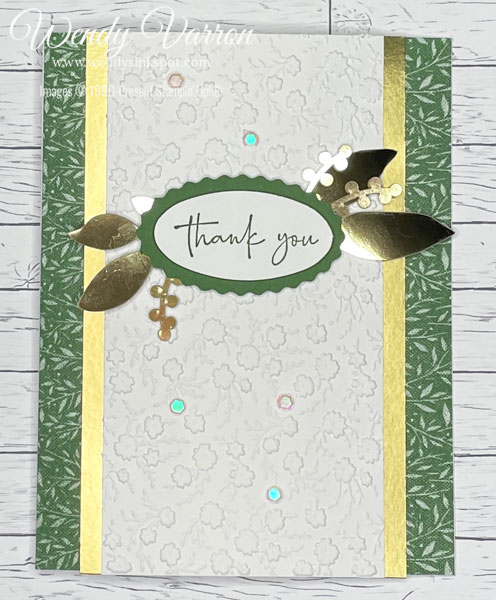
This month my Customer Thank You Cards are inspired by the Annual Catalog. If you are ever looking for inspiration the Annual Catalog is a great place to start, it’s a treasure trove of amazing creations. I took the inspiration from page 68, the Simply Elegant Suite card. I love the elements in this card, it showcases Designer Series Paper and stamping directly on to the cardstock card base.

To make my card I started with stamping the beautiful swirl from the Sentimental Swirl stamp set on the left side of the cardbase. I love stamping tone on tone, it really makes the already pretty colors so much richer. I also stamped some of the swirls on the inside of my cards.

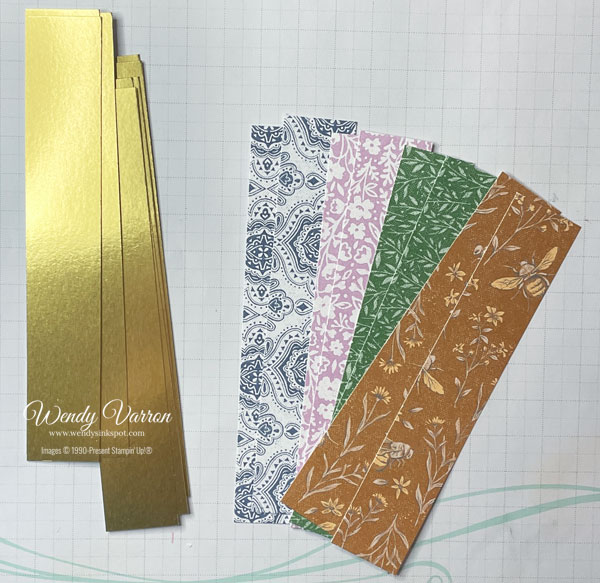
Next, I cut strips of the Abstract Beauty DSP and Gold Foil paper. I adhered the DSP to the Gold Foil Strip, then using Multipurpose Liquid Glue, added them to the right side of the card base.

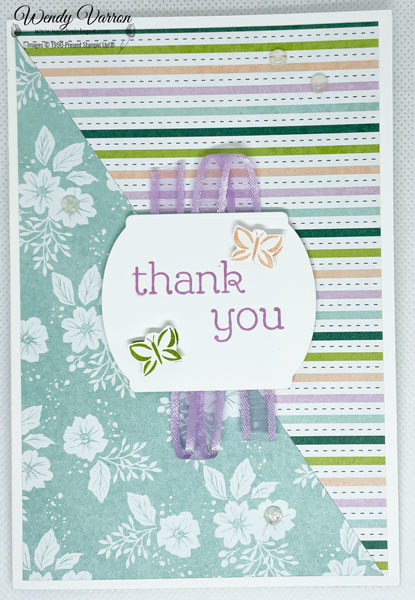
I stamped the sentiment from the Flowering Tulips stamp set in Magenta Madness on the label. Before adding the label to my card, I adhered a gold foil element from the Expressions in Ink Ephemera Pack to the back of the lable with some Stampin’ Seal. I cut a piece of Foam Adhesive sheet which I added to the back of the label over the Gold Foil element. Doing this keeps the Gold Foil element lifted off the card but firmly in place on the back of the label.

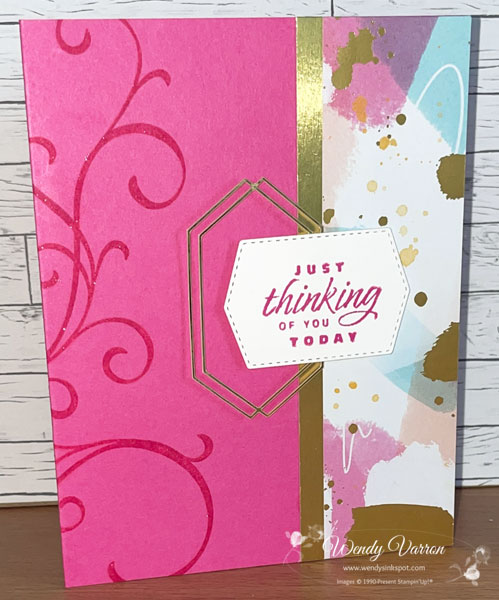
I wanted to use all the 2020-2022 In Colors and the Abstract Beauty DSP was perfect to pair with these pretty colors. Once I started taking photos of my cards, I had some inspiration to add just a touch of bling, I brushed a little Wink of Stella on the swirls. I love the look, but it was hard to photograph.

Just Thinking of You Today Card Measurements:

  • Cardbase: 5-1/2″ x 8-1/2″, score in half at 4-1/4″
  • Abstract Beauty DSP: 1-1/2″ x 5-1/2″
  • Gold Foil: 3/4″ x 5-1/2″

I’d love to be your Stampin’ Up!® Demonstrator. All the Stampin’ Up! supplies used to make my card are available in my online store. Simply click any of the product photos below!

Product List

Happy Stamping!

March Customer Thank You Cards Read More »

February 2022 Customer Thank You Cards – Happy & Heartfelt

Thank you for joining us for our Stampin’ Up!® Demonstrator Training Program Monthly Blog Hop! We are so happy that you could join us today for this blog hop for ideas and creative inspiration. We are a group of Stampin’ Up!® Demonstrators from around the world that are taking part in training that is helping us to build a successful Stampin’ Up!® business and reach some goals we have set. We really appreciate your support.

You may be starting here or have come from another blog – either way you can find the link list at the bottom of this post so that you can see every blog post and idea today.

This month my Customer Thank You cards feature the Happy & Heartfelt Stamp set and the Heart & Home Designer Series Paper. I love the colors and designs of the Heart & Home DSP, I’ve use several of them on my cards this month. This is a great card layout if you need to create some cards in multiples, they are quite easy to do.

After selecting the patterns I wanted to use, I cut the strips of Heart & Home DSP & Gold Foil for my cards. Then using the Happy & Heartfelt Stamp Set, I stamped the Thank You in coordinating colors on Basic White and Very Vanilla cardstock and punched them out along with coordinating scalloped ovals with the Double Oval Punch.

Next, I embossed some Basic White and Very Vanilla cardstock with the Ornate Floral 3D embossing folder. Then I adhered the Gold Foil Strips to the embossed card stock and trimmed them.

Taking the strips of the Heart & Home DSP, I adhered them to my card bases. Before adhering the embossed layer, I attached the sentiment stamped ovals to the scalloped ovals with Stampin’ Dimensionals. Using Mini Glue Dots on the back of the labels I adhered a few of the Gold Foil leaves and stems from the Expressions in ink Ephemera pack. Then using Stampin Dimensionals, I attached the labels to the embossed layer. To finish my cards I adhered the embossed layer to the card base and added a few of the iridescent sequins from the Expressions in Ink Ephemera Pack.

As mentioned at the top, this is a blog hop so make sure you ‘hop’ around to all the amazing projects on this hop! Click on the links below to visit them.


Happy & Heartfelt Card Measurements

  • Very Vanilla/Basic White card base: 5-1/2″ x 8-1/2″, score in half at 4-1/4″
  • DSP Strips (2): 1″ x 5-1/2″
  • Gold Foil Strips (2): 1″ x 5-1/2″
  • Embossed card stock layer: 2-7/8″ x 5-1/2″

I hope you enjoyed my cards today. Leave me a comment below and let me know what you think.

I’d love to be your Stampin’ Up!® Demonstrator. All the Stampin’ Up! supplies used to make my card are available in my online store. Simply click any of the product photos below!

Product List

Happy Stamping!

February 2022 Customer Thank You Cards – Happy & Heartfelt Read More »

January 2022 Customer Thank You Cards – Sentimental Swirls

Thank you for joining us for our Stampin’ Up!® Demonstrator Training Program Monthly Blog Hop! We are so happy that you could join us today for this blog hop for ideas and creative inspiration. We are a group of Stampin’ Up!® Demonstrators from around the world that are taking part in training that is helping us to build a successful Stampin’ Up!® business and reach some goals we have set. We really appreciate your support.

You may be starting here or have come from another blog – either way you can find the link list at the bottom of this post so that you can see every blog post and idea today.

My Thank You Cards this month feature 2 new products, The Sentimental Swirls Stamp Set available in the Jan- June 2022 Mini Catalog and the Friendly Hello Designer Series Paper from the Friendly Hello Bundle available in the Jan-Feb Sale-a-Bration Brochure.

Using the Friendly Hello Designer Series Paper, I cut 2 Patterns for the card front. Stacking them together to cut them at the same time, I put them on my Paper Trimmer to cut them diagonally.

Using the largest card from the Assorted Memories & More Cards & Envelopes pack as my card base, I attached 2 different patterns of the DSP I cut with Multipurpose Liquid Glue. I love the look of the 2 patterns together on the card front. Cutting them together made it very easy to match them up so they fit together nicely when I put them on the card front.

I die cut the label in Basic White with the Tasteful Labels dies. Using my new favorite stamp set from the Mini Catalog, Sentimental Swirls, I stamped the Thank You in Fresh Freesia. The butterflies are stamped in Granny Apple Green and Petal Pink on the label. Then I decided to stamp them again and fussy cut them out to add with Stampin’ Dimensionals.

I used the Fresh Freesia Open Weave Ribbon to add to the back of the sentiment with some Stampin’ Seal adhesive. Then I used the Foam Adhesive Sheets, cut a square and put that over top of the ribbon. This will keep the label from sagging and the ribbon in place. If you haven’t tried the Foam Adhesive sheets yet, give them a try. They are very easy to cut to whatever shape you need, and give a little extra support to whatever elements you use them with.

After attaching the label to the card, I added the extra butterflies that I fussy cut. I like the extra dimension of adding them with Stampin’ Dimensionals. I couldn’t resist adding a Wink of Stella to the to make them shimmer. For the finishing touch, I added a few of the Opal Rounds to the cards.


As mentioned at the top, this is a blog hop so make sure you ‘hop’ around to all the amazing projects on this hop! Click on the links below to visit them.


Thank You Card Measurements

  • Memories & More Assorted Cards & Envelopes – The largest card was used for the base of my cards.
  • Friendly Hello DSP – 4″ x 6″
  • Fresh Freesia Open Weave Ribbon – 11-3/4″

I’d love to be your Stampin’ Up!® Demonstrator. All the Stampin’ Up! supplies used to make my card are available in my online store. Simply click any of the product photos below!

Product List

Happy Stamping!

January 2022 Customer Thank You Cards – Sentimental Swirls Read More »

Scroll to Top