INTRODUCING THE WREATH OF BLOOMS KIT, THE NEWEST ADDITION TO THE STAMPIN’ UP! KITS COLLECTION!
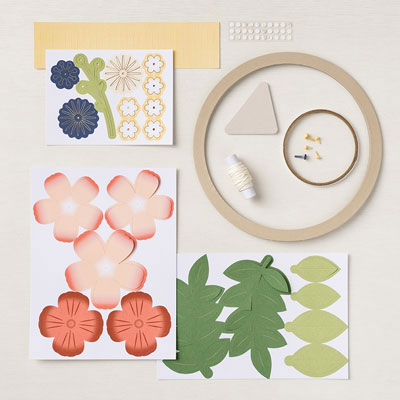
The Wreath of Blooms Kit is a special addition to the kits collection; it comes with everything you need to make your very own home decor piece!
This kit is such a fun way to try new crafting techniques and create something special for your home! You’ll get an 8″ diameter wreath to fill with blossoms. Roll and shape the precut paper pieces to make three-dimensional flowers. Pin them together with brads and glue them to the wreath (a hot glue gun is not included in this kit). Then hang it for all your friends and family to see!
This month’s kit includes:
One 8″ diameter chipboard wreath
Pre-cut paper pieces that can be rolled & shaped into three-dimensional blossoms
Multicolored brads to keep everything together
Thick twine to hang your wreath
Adhesive*
Coordinating colors: Cajun Craze, Calypso Coral, Crumb Cake, Garden Green, Night of Navy, Pear Pizzazz, Petal Pink, So Saffron, white.
*please not that you will need a hot glue gun for this project, which is not include in the kit.
Watch the unboxing video below. Stampin’ Up! CEO Sara Douglass will show you steap-by-step how to put this fun kit together.
I’d love to be your Stampin’ Up!® Demonstrator. The new Wreath of Blooms Kit and all the Kits in the Kits Collection card are available in my online store. Simply click any of the product photos below!
Welcome to the Luv 2 Stamp Group’s 2023 Blog Hop! We are excited to share projects with you again for the third year. This year we are shaking things up and bringing you all new monthly themes to inspire your next project!
Once you are done with each post, scroll down to the bottom and you will see a list of Blog Hop participants, you can click on their name to go to their post, or you can click the next button to go to the next post in line. Happy crafting!
Our first Blog Hop Theme of 2023 is Sweet Treats!
My festive St. Patrick’s Day Treats were inspired by the Jan-June 2023 Mini Catalog. Page 8 of the mini catalog I noticed these cute treats created with the Country Floral Lane Suite. These cute treats can be recreated for any occasion and they are quick to make.
I have been waiting for a St. Patrick’s Day stamp set, the Luck Clover Bundle first bundle I put on my mini catalog shopping list. It was perfect for creating these treat holders for St. Patrick’s Day or to just wish someone good luck!
To create the wrappers I started with a piece of Granny Apple Green Cardstock cut to 5-1/2″ x 6-3/4″. On the long side score the cardstock at 2″, 2-1/4″, 4-1/2″, 4-3/4″. Then I stamped the clovers in Granny Apple Green along the top and bottom edges. I used Tear & Tape to adhere the wrapper closed. The Dandy Designs DSP layer of the wrapper is cut to 4-1/2″ x 6-3/4″, for this layer of the wrapper I didn’t make any score lines, I just wrapped it around the cardstock layer and adhered again with Tear & Tape.
To decorate the font of the wrappers I used Basic White Cardstock and die cut the scalloped circle with the All That Dies and stamped clovers on them in Granny Apple Green. I stamped each of the sentiments in Granny Apple Green and snipped them out with my paper snips. I adhered them with Mini Glue Dots.
I stamped the large clovers in Granny Apple Green using the Stamparatus. I prefer to stamp with Stamparatus on larger solid images works better for me than using a clear block, this way I can re-ink and stamp the image if it’s not clear. I punched them out with the Lucky Clover Punch and added them to the wrapper with Mini Glue Dots.
I can’t resist adding a little bling to my projects and for these fun treats I added a few Iridescent Pastel Gems. Before slipping in the chocolate bar I wrapped a piece of the Burlap Ribbon from the Real Red & Burlap Ribbon Combo pack around the bar. Then tied them at the top with a piece of White Crinkle Seam binding colored with Soft Sea Foam Stampin’ Blends.
Be sure to Hop along with all of our Blog Hop participants and see all their amazing projects! Just click on their name in the list below to go to their post, or you can click the next button to go to the next post in line.
Granny Apple Green Cardstock – 5-1/2″ x 6-3/4″, score on the long edge at 2″, 2-1/4″, 4-1/2″, 4-3/4″
Dandy Designs DSP – 4-1/2″ x 6-3/4″
I hope you enjoyed my Sweet Treat project! All the Stampin’ Up! supplies used to make my treat sleeves are available in my online store. Simply click any of the product photos below!
Make cloudy days a little brighter with the Sunshine & Smiles Paper Pumpkin Kit! This kit includes nine sweet and sunny cards—three each of three designs. If someone you know is weathering a storm, this kit is just what you’ll need to create cards that are sure to brighten their day!
AND for the first time ever, we’ve got a coordinating die add-on!!(Stampin’ Cut & Emboss Machine sold separately). Keep Reading to learn more!
About the Sunshine & Smiles Paper Pumpkin Kit
This kit includes:
Everything you need to create 9 radiant cards—3 each of 3 designs—and 9 coordinating envelopes.
A sweet springtime photopolymer stamp set.
A Mango Melody Stampin’ Spot
Peek through Cards! Catch a glimpse of sunshine through those springtime showers with this kit’s playful peek-through cards! Each card includes an open window in the front, perfect for adding a touch of dimension and layering! You’ll have fun crafting with these cards—rain or shine!
Cute precut critters and labels, fun raindrop embellishments, and more!
Finished card size: 5-1/2″ x 4-1/4″ (14 x 10.8 cm)
Love the Kit? Take your crafting to the next level with the coordinating Rain or Shine Suite Collection ( item number: 160556) in the January – April 2023 Mini Catalog! You can use the stamps from the suite and the kit to create supportive, friendship themed cards!
Coordinating Add-On Dies
Introducing our first-ever coordinating dies* add-on! Available now online during the subscription period Jan 11-Feb 10, but only while supplies last.
Add-on includes: * 2 dies * Die size: 1-1/8″ x 7/8″ ( 2.9 x 2.2 cm
*You must be an active Paper Pumpkin subscriber to order this item. Stampin’ Cut & Emboss Machine sold separately.
Subscribe to the February Paper Pumpkin Kit between January 11, 2023 and February 10, 2023 by Clicking Here!
Wait There’s More
Did you know? Stampin’Up! also offers Prepaid 1 month, 3 month, 6 month or 12 month Subscriptions which allow you to pay ahead or give as a gift. AND during Sale-A-Bration when you purchase a 3 month, 6 month or 12 month Subscription you can earn FREE Sale-a-Bration products!!
Just click the image below for the prepaid subscription of your choice.
We invite you to say thank you to the people who make your day, every day with Saying Thanks all-inclusive card kit! This month’s kit has everything you need to show appreciation to family and friends who light up your life! Make nine bright, colorful cards in no time to say thank you, recognize friends, and share your gratitude with a bright watercolor wash that won’t go unnoticed! You’ll never miss an opportunity to express gratitude with this colorful kit! You’ll be able to purchase this new kit beginning January 5th!
Kit Details:
Enough supplies to create 9 cards—3 each of 3 designs—and 9 coordinating envelopes.
Printed die-cut words in Dutch, English, French and German
Printed precut pieces, and enough adhesive to complete projects.
White baker’s twine and iridescent diamond sequins.
Finished card size: 5-1/2″ x 4-1/4″ (14 x 10.8 cm).
We are excited to share projects with you again this year. We hope to inspire you to create beautiful new projects using Stampin’ Up! products. For our theme this month we are featuring New Products coming on January 5th!
Once you are done with each post, scroll down to the bottom and you will see a list of Blog Hop participants, you can click on their name to go to their post, or you can click the next button to go to the next post. Happy Crafting!
One of the Stamp sets I received with my pre-order is the Seaside Bay Stamp set. I I love the crab image in this set. It reminds me of the summers when I was a kid, we spent a week at the beach with my grandparents. Every year one night for dinner we would have a bushel of steamed crabs. Grandad taught us how to open them, pick them and crack open the claws.
To create my card I started with a Balmy Blue Cardbase. I selected 3 patterns from the By The Bay Specialty Designer Series Paper. I cut 2 strips of the DSP to 1/2″ x 5-1/2″ and attached them to the front of the cardbase. I love the pattern of the Night of Navy DSP pattern it looks like water.
With a second pattern of the By the Bay DSP I trimmed it to 3-3/4″ x 5-1/2″ and adhered it to the cardbase.
To create the label, I selected a 3rd pattern of the By the Bay DSP and trimmed it to 2-1/4″ x 3-1/2″. I adhered it to the Night of Navy pattern cut to 2-1/2″ x 3-3/4″. On a piece of Basic White cardstock, I stamped the sentiment in Night of Navy and added the sand stamp in Sahara Sand. I die cut it with the Something Fancy Dies. I attached it to the label layer with Stampin’ Dimensionals. I stamped the crab on Basic White in Pacific Point and fussy cut it out and adhered it to the sentiment.
To finish the front of the card I added a few Iridescent Pastel Gems! I love a bit of sparkle on a card.
Inside the card I added a Basic White panel with a strip of DSP cut to 1/2″ x 5-1/2″.
All the amazing products I used to create my card, Seaside Bay Stamp Set, Something Fancy Dies, By the Bay Specialty DSP (pictured below with the Iridescent Pastel Gems) will be available beginning January 5, 2023!!
For more inspiration from the Luv 2 Stamp Group Blog Hop Team, click on the image below to visit the talented Kurstan del Rosario. Don’t forget to continue following links on each blog to see everyone’s projects!
Balmy Blue card base: 5-1/2″ x 8-1/2″, score and fold in half
By the Bay DSP: (2) for card front 1/2″ x 5-1/2″
3-3/4″ x 5-1/2″
2-1/4″ x 3-1/2″
2-1/2″ x 3-3/4″
Basic White inside panel: 4″ 5-1/2″
By the Bay DSP: (1) for inside card 1/2″ 5-1/2″
I hope you enjoyed this sneak peek at some of the new products coming in the 2023 Jan – April Mini Catalog. They will be available January 5th, add them to your list now! You can shop for all the other products I used now. Just click any of the images below to shop.
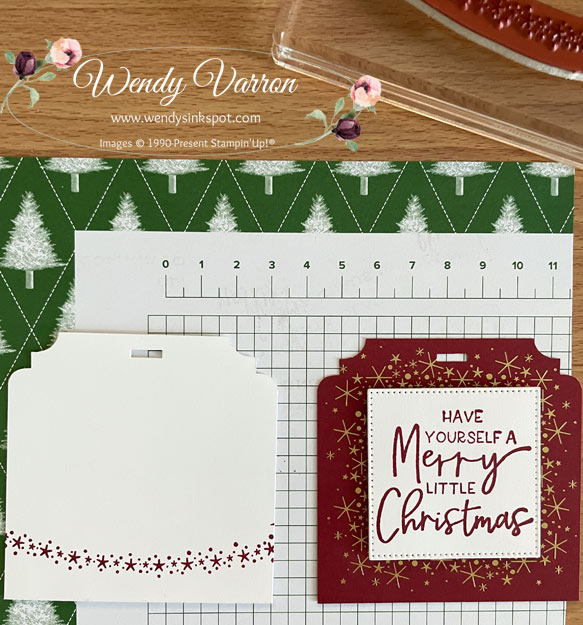
I love to make handmade gift tags as well as handmade cards! Although I never seem to make enough of them and this time of year I usually need to make more. These are some of my favorite tags I’ve made. The Very Best Trio Punch and Lights Aglow Specialty DSP with the gold foil accents made these pretty tags come together quickly.
Even thought the Lights Aglow DSP is no longer available(sorry I didn’t get these posted before it sold out) you can make these tags with any DSP for any occasion.
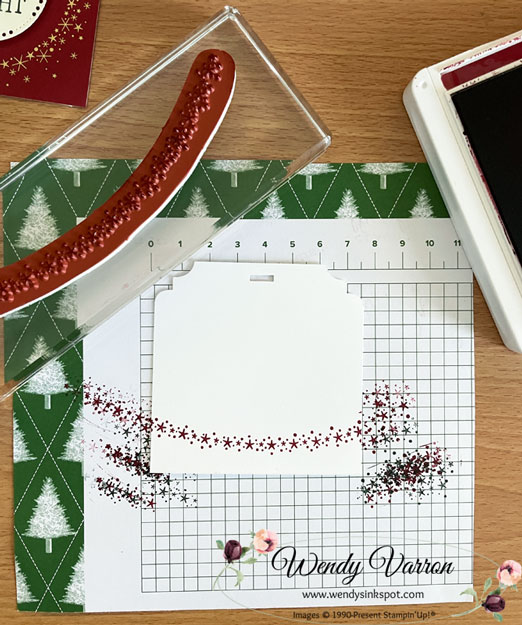
I started by cutting some Basic White Cardstock to 3″x3″ and punching the corners then the tag for the ribbon with the Very Best Trio Punch. Using the Christmas Lights stamp set I stamped the stars across the bottom of the tags in Cherry Cobbler and Evening Evergreen ink.
Next, I cut the Lights Aglow DSP and punched the corners and tags. Using the Stylish shapes Dies I die cut some stitched squares and circles. Then, I stamped the sentiments in Cherry Cobbler and Evening Evergreen Ink from the Brightest Glow & Framed & Festive stamp sets.
To finish the tags I added some White Glittered Organdy Ribbon and Soft Succulent Open Weave Ribbon.
I hope you enjoyed my gift tags. You can purchase the stamp sets, punch, cardstock and ink along with other supplies to create your own tags in my online store.