All the Little Things

All the Little Things Paper Pumpkin kit!

You are sure to love April’s Paper Pumpkin Kit with its elegant designs, bright colors and iridescent foil details. You can make a card for anyone and for any occasion!

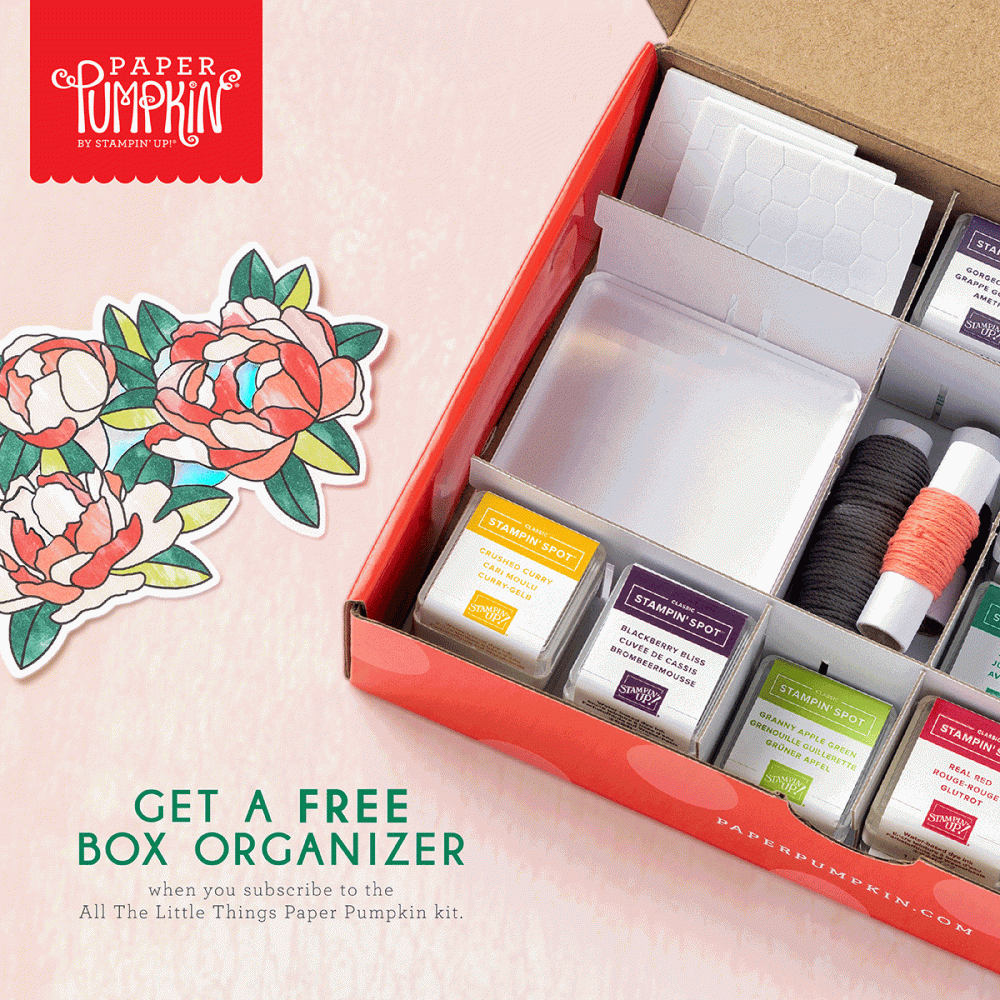
And don’t wait, because anyone who subscribes to this month’s kit will get a FREE box organizer!

This organizer fits perfectly inside your Paper Pumpkin box and is great for keeping your supplies from past kits organized, so you know right where everything is! 
Ten Years of Growth Refill Kit includes:

  • All the supplies you need to create 9 card, 3 each of 3 designs, plus 9 coordinating envelopes.
  • A 7-piece all-occasion stamp set that celebrates good friends and great adventures!
  • 1 Copper Clay (new In Color!) Classic Stampin’ Spot.
  • Twine and die-cut accents
  • FREE stickers to put on your projects or anything you want—water bottles, laptops, coolers, and more!
  • Final card size: 5-1/2” x 4-1/4” (14 x 10.8 cm). 
  • Coordinating Stampin’ Up! colors: Balmy Blue, Basic Black, Calypso Coral, Granny Apple Green, Petal Pink, Poppy Parade, Shaded Spruce.

Subscribe by April 10, 2023 to get the April kit and the free box organizer BY CLICKING HERE!

Stampin’Up! also offers Prepaid 1 month, 3 month, 6 month or 12 month Paper Pumpkin Subscriptions which allow you to pay ahead or give as a gift.  Just click the image below for the prepaid subscription of your choice.

Want to leave a comment? Please Click Here

Try a New Color Combination

Color combinations are a great source for creative inspiration. Stampin’ Up! has an amazing rainbow of colors to create hundreds of color combinations. I have a few unique color combinations to share with you.

The first card I want to share with you today was inspired by this unique color combination.

Arranging the hexagons at an angle and varying the arrangement of sizes and colors gives this card a fun, funky feel.

The next card I have to share with you was inspired by these unique colors.

To make this card feel different, die cut some Old Olive and Petal Pink 6″ x 6″ Designer Series Paper to create the leaf and flower shapes. Then we added some Calypso Coral and Old Olive cardstock.

Looking for more color combination inspiration? You can download Stampin’ Up!’s Color Coach charts. Just click the images below to download them. Pick your favorite color combinations from a Color Coach, gather your supplies and start creating!

Brights, Neutrals, Regals, Subtles Color Coach
In Colors Color Coach

Want to recreate the projects I shared with you today? You can purchase the products used for the projects today in my online store. Just click any of the images below.

Happy Stamping!

Lucky Clover Inspiration

It’s March and that means St. Patrick’s Day is coming soon and I think of all things green! The Lucky Clover stamp set isn’t just for St. Patrick’s day, it’s a great set for creating cards of appreciation and support. This set features clover images in various style and sizes. The bigger clover make a fun focal point and the smaller clovers are perfect for accents.

This simple stamped card I have to share with you today was created with the Note Cards & Envelopes, The Lucky Clover stamp set and the Shaded Spruce ink pad. That’s it! It’s easy to create a simple and pretty card with just paper, ink and stamps. I also stamped a clover on the envelope for a fun detail.

I’d love to be your Stampin’ Up!® Demonstrator. All the Stampin’ Up! supplies used to make my card are available in my online store. Simply click any of the product photos below!

Need More inspiration? Here are a few more projects created with the Lucky Clover stamp set.

 I love to read your comments!  To leave a comment please Click Here.

Happy Stamping!

Luv 2 Stamp Group Blog Hop-Awash In Beauty

We are excited to share projects with you again this year. We hope to inspire you to create beautiful new projects. Each month we will have a different theme based on the next month’s celebrations using Stampin’ Up! products. Once you are done with each post, scroll down to the bottom and you will see a list of Blog Hop participants. You can click on their names to go to their post, or you can click the next button to go to the next post in line. We hope you enjoy all our projects featuring Designer Series Paper!

The accordion fold I used for my card today is perfect for the Awash In Beauty Designer Series Paper with all the pretty colors and flowers. To create this pretty card, start with a piece of Designer Series Paper cut to 5-1/4″ x11-3/4″, score on the long side at 1-3/4″, 4-3/4″, & 7-3/4″. Then adhere the largest side of the fun fold to the cardstock card base.

Inside I adhered a piece of Basic White dies cut from the Scallop Contours Dies.

I stamped the sentiments, then die cut the labels with the Something Fancy Dies. Then I stamped and die cut flowers and foliage using the new Irresistable Blooms Bundle, which will be available beginning March 1st. Then I used Blending Brushes to shade in the blooms and foliage. I layered the sentiments and flowers on the Designer Series Paper.

I added a few Iridescent Rhinestone Basic Jewels to the flowers and Brushed Brass Butterflies as the final touch for this pretty card.

I love how this card turned out so I made a few more and used the Deckled Rectangles Dies as well as the Scallop Contours Dies for the inside of the card.

For more inspiration from the Luv 2 Stamp Group Blog Hop Team, click on the image below to visit the talented Jo Anne Hewins. Don’t forget to continue following links on each blog to see everyone’s projects!

Hello Ladybug Card Measurements:

  • Cardstock card base: 4-1/4″ x 11″, score and fold in half at 5-1/2″

I hope you enjoyed my cards. I’d love to be your Stampin’ Up!® Demonstrator. All the Stampin’ Up! supplies used (the Irresistible Blooms Bundle will be available beginning March 1st) to make my card are available in my online store. Simply click any of the product photos below!

I love to read your comments!  To leave a comment Please CLICK HERE.

Want to leave a comment? Please CLICK HERE.

Celebrating 10 Years of Paper Pumpkin

Happy, fresh, and colorful vibes to celebrate ten years of growth!

It’s Paper Pumpkin’s 10 year anniversary and the March Kit is a celebration of how much Paper Pumpkin has grown! This month’s kit is all about happy greetings, organic and botanical designs digitally painted by our in-house artists, along with all-occasion sentiments to celebrate the happy moments in life and recognize the people around you who help you grow! 

And as part of our anniversary celebration, the March Paper Pumpkin Kit also includes a FREE GIFT that we hope you will love! This additional exclusive stamp set adds versatility and creative possibilities to your project.

The Ten Years of Growth Kit includes:

  • All the supplies you need to create 9 cards: 3 each of 3 designs; and 9 coordinating envelopes.
  • An all-occasion stamp set to celebrate happy moments and recognize the people in your life who help you grow.
  • Gold foil sentiments.
  • Paper pieces and embellishments with digitally-painted designs and images.
  • One Polished Pink Stampin’ Spot.
  • One FREE stamp set to celebrate our 10-year anniversary and all our Paper Pumpkin subscribers!

Completed card size: 5-1/2″ x 4-1/4″ (14 x 10.8  cm)

Coordinating Stampin’ Up! colors: Shaded Spruce, Garden Green, Coastal Cabana, Orchid Oasis, Fresh Freesia, Polished Pink, Crumb Cake

There’s no better time to sign up or renew your Paper Pumpkin subscription and get your FREE stamp set! Subscribe to receive the March Paper Pumpkin Kit between February 11, 2023 and March 10, 2023 BY CLICKING HERE!

Wait There’s More

Did you know? Stampin’Up! also offers Prepaid 1 month, 3 month, 6 month or 12 month Subscriptions which allow you to pay ahead or give as a gift. Just click the image below for the prepaid subscription of your choice.

Happy Stamping!

Fun with Ribbon Stamping

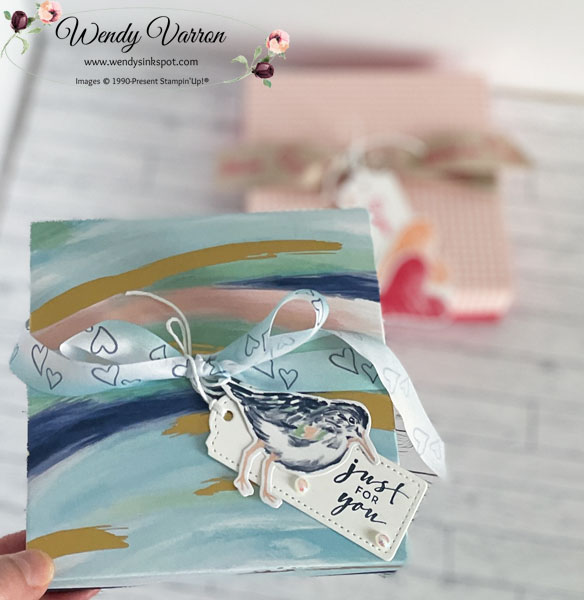
Have you ever tried stamping on ribbon? It’s an easy and fun way to personalize ribbon for gift boxes, cards, bags etc. I stamped on both the Natural finish Ribbon and the Balmy Blue & White Variegated Ribbon for my gift boxes.

To create the box bottom, I cut a piece of Night of Navy cardstock at 7″ x 7″, score on all four sides at 1-1/4″. Cut slits for the tabs. I added a few small pieces of Tear & Tape on each tab, then folded them to create the corners.

For the box top, I used a piece of By the Bay 6″ x6″ DSP, scored on all four sides at 3/4″. Again I cut the slits for the tabs. I added a few small pieces of Tear & Tape on each tab, then folded them to create the corners.

Next, I stamped hearts with the Country Bouquet Stamp set in Night of Navy directly on the Balmy Blue & White Variegated Ribbon. To keep the ink from smearing, leave the ribbon to try, I let this ribbon sit for about a half hour. You’ll want to wait longer for a heavier ribbon like the Natural Finish Ribbon that I used on a second box. Once dry I tied the ribbon on the box.

The tag is made with Tailor Made Tags Dies. I stamped the sentiment in Night of Navy then, die cut the bird from the By the Bay DSP with the Seaside Bay Dies and adhered to the tag. To finish the tag I added a few Flat Pearls and tied it to the bow with White Bakers Twine.

I created this second box with the Country Bouquet Collection Suite.

Gift Box Measurements

  • Box Base: 7″ x 7″, score on all 4 sides at 1-1/4″
  • Box Top: 6″ x 6″, score on all 4 sides at 3/4″

I’d love to be your Stampin’ Up!® Demonstrator. All the Stampin’ Up! supplies used to make my boxes are available in my online store. Simply click any of the product photos below!

Happy Stamping!

Scroll to Top