Set sail across the ocean with the Sending Good Thoughts Paper Pumpkin Kit! With beautifully designed nautical imagery, a fun message in a bottle motif, and sentiments that are “shore” to please, this month’s kit is full of warmth and fun.
The Sending Good Thoughts kit includes:
Supplies to create 9 cards, 3 each of 3 designs, & 9 coordinating envelopes.
Nautical-themed cards for those who need a loving message in a bottle!
An exclusive Sending Good Thoughts Photopolymer Stamp Set
Bermuda Bay Classic Stampin’ Spot®
Printed dry-embossed card bases
Printed envelopes
Printed die cuts
Twine
Mini glue dots
Dimensionals
We also have a special game for you to play—take part in the Sea if You Know Paper Pumpkin quiz and subscribe to the Sending Good Thoughts Paper Pumpkin Kit to be entered to win a 1-month prepaid Paper Pumpkin code! Anyone can play to discover features of the Sending Good Thoughts kit!
Subscribe to the July Paper Pumpkin Kit between June 11 – July 10, 2022 to receive the Sending Good Thoughts Paper Pumpkin Kit! Click the button below to subscribe.
Stampin’Up! also offers prepaid subscriptions which allow you to pay ahead or give as a gift. Just click the image below for the prepaid subscription of your choice.
Thank you for joining us for our Stampin’ Up!® Demonstrator Training Program Monthly Blog Hop! We are so happy that you could join us today for this blog hop of ideas and creative inspiration. We are a group of Stampin’ Up!® Demonstrators from around the world that are taking part in training that is helping us to build a successful Stampin’ Up!® business and reach some goals we have set. You may be starting here or have come from another blog – either way you can find the link list at the bottom of this post so that you can see every blog post and idea today.We really appreciate your support.
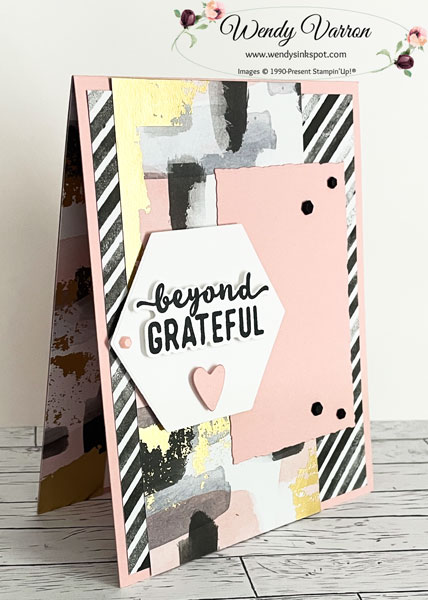
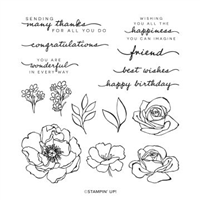
My Customer Thank You cards this month feature the Charming Sentiments Bundle and Abstract Beauty DSP. If you’ve been following me you know that I love an eye catching and easy to create card. This pretty card is no exception, and this card layout is also great for showing off Designer Series Paper.
To create this card I cut a piece of Blushing Bride Cardstock to 4-1/4″ x 11″ and scored it in half at 5-1/2″. I adhered a 4″ x 5-1/4″ piece of Abstract Beauty DSP to the card base. Next, I adhered a 2-3/4″ x 5-1/2″ piece of Abstract Beauty DSP. I die cut a piece of Blushing Bride cardstock using the Deckled Rectangles Dies and adhered it to the card.
To Create the label, I die cut the hexagon with the Beautiful Shapes Dies. Then using the Charming Sentiments stamp set, I stamped the sentiment in Tuxedo Black Memento Ink and die cut it with the Charming Sentiments Dies. I love the extra shapes that are included with the Charming Sentiments Dies and cut out the Blushing Bride heart. I added the sentiment and heart to the hexagon with Stampin’ Dimensionals, then added the hexagon with Stampin’ Dimensionals as well. To finish the front of my card I added a few Adhesive Backed Hexagons.
On the inside of my card I added a piece of Basic White DSP and Abstract Beauty DSP. This strip of Abstract Beauty DSP is the scrap left over from the same pattern I used on the card front, trimmed to 1″ x 5-1/2″. I wanted us use up my pack of Abstract Beauty DSP before it retires at the end of the month, so I created several in one batch.
As mentioned at the top, this is a blog hop so make sure you ‘hop’ around to all the amazing projects on this hop! Click on the links below to visit them.
Beyond Grateful Card Measurements:
Card base:4-1/4″ x 11″, score in half at 5-1/2″
DSP Layer: 4″ x 5-1/4″
DSP Layer: 2-3/4″ x 5-1/2″
Basic White Inside Card: 4″ x 5-1/4″
DSP Strip inside Card: 1″ x 51/2″
I hope you enjoyed my cards. If you need any of the supplies to make these thank you cards, I’d love to be your Stampin’ Up!® Demonstrator. All the Stampin’ Up! supplies used to make my card are available in my online store. Simply click any of the product photos below!
If you’re looking for the perfect stamp and punch combo, here it is! The Let’s Set Sail Bundle includes the Let’s Set Sail Stamp Set and the Sailboat Punch—the perfect pair for creating so many different types of projects!
I’m a huge fan of punches because they’re easy to use, they’re portable, and they don’t take much storage space. It’s so simple to stamp a sailboat and then punch it out. Fun tip: You can also use the larger water image as a cloud!
I love the versatility of this bundle, your not limited to sailing-based projects. The sentiments in the stamp set open up lots of possibilities! Create cards for birthdays, graduations, and other celebrations. Make a card for someone who’s embarking on a new adventure. Add a Father’s Day sentiment from another set to create a Father’s Day card your guy will love. Its a set you can use all year long!
Watch the short video below see some ideas for creating this this great bundle.
Looking for more inspiration? Here are a few other projects created with the versatile bundle.
If you’re ready to sail away on a new crafting adventure, choose this bundle! When you purchase the Let’s Set Sail Bundle get 10% off with bundled savings! If you’d like to learn more about this pair of products or place an order, let me know! I’d be happy to help you.
The inspiration for this piggy card came from Michelle Wilder, who presented 3 projects using the super cute This Birthday Piggy stamp set, at a Luv 2 Stamp Group Team event last weekend. Thanks Michelle for the inspiration!
I die cut a square with the Stylish Shapes Dies. Next I stamped the piggy image in Tuxedo Black memento Ink, and colored in the image with Stampin Blends. Then I stamped a few butterflies in Orchid Oasis and Tahitian Tide and added a few of the In Color Matte Decorative Dots. I adhered the square to the card base with Stampin’ Dimensionals.
I stamped the sentiment in Orchid Oasis and die cut it with the Decorative Labels Dies, adhered it to the bottom of the square with a Mini Glue Dot and a Stampin’ Dimensional. To finish I tied a bow with the In Color Bakers Twine to label.
This Birthday Piggy Thinking of You Card Measurements:
2022 – 2024 In Color DSP Assortment: 3 strips cut to 1-1/2″ x 4-1/4″
Basic White Cardstock Scrap to die cut Square and Label
I’d love to be your Stampin’ Up!® Demonstrator! All the Stampin’ Up! supplies used to make my card are available in my online store. Simply click any of the product photos below!
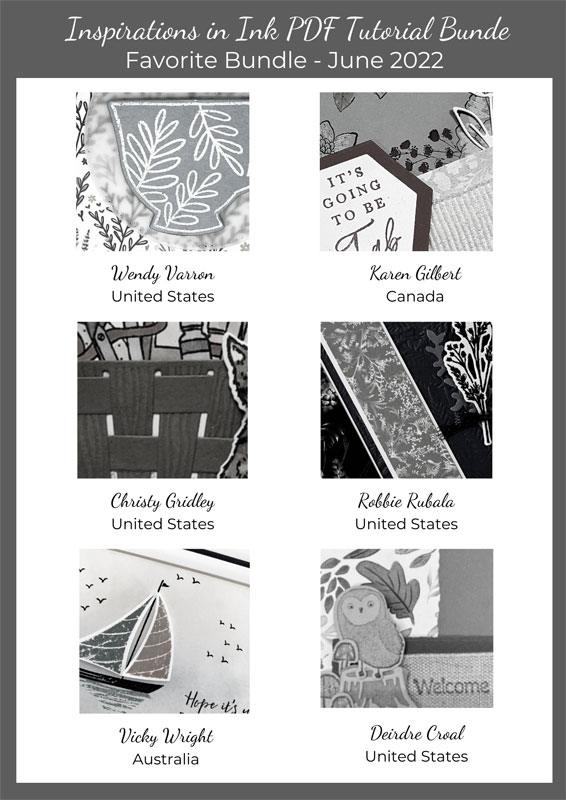
The Inspirations In Ink Team has a new Tutorial Bundle! This month our focus was on our Favorite New Bundle in the Annual Catalog. We’ve put together 6 tutorials with 6 different Bundles. Here’s a sneak peek.
How to obtain your copy FREE from me
Receive a copy of this Bundle for FREE when you purchase $35 or more through my online store using my June Host Code: EGB94HNH
Receive as a FREE Gift from me monthly when you purchase the Starter Kit and become a Team Member of mine.
Does my card look familiar? I CASED a card in the Stampin’ Up! Annual Catalog for inspiration and slightly changed the label. Case-ing means Copy And Share Everything, and is a great source for inspiration. The cards made with the Hues of Happiness Suite catch my eye every time I’m looking through the catalog. This pretty card was quick to make and is perfect for any occasion.
I started with a piece of Fresh Freesia card stock for the card base. I trimmed and adhered a piece of the Hues of Happiness DSP to add to the base.
Using Stylish Shapes dies I die cut a Granny Apple Green Label. Then I cut a piece of the Hues of Happiness DSP to 3/4’x 3″ and punched one end with the Banners Pick A Punch and adhered it to the Granny Apple Green label. I trimmed the end of the Granny Apple Green Label so it would be flush with the end of the card. Then I cut a piece of Basic White Cardstock to 3/4″ x 2-1/4″ and stamped the sentiment in Gorgeous Grape and adhered it to the label.
I used Stampin’ Dimensionals to add the label to the card. I added a little sparkle with a few Gorgeous Grape Glassy Dots to finish my card.
Hues of Happiness You Are Wonderful Card Measurements:
Fresh Freesia Card base: 5-1/2″ x 8-1/2″, score at 4-1/4″
Hues of Happiness DSP: 3-3/4″ x 5-1/2″
Hues of Happiness DSP Strip for Label: 3/4″ x 3″
Basic White Cardstock for Label: 3/4″x 2-1/4″
I’d love to be your Stampin’ Up!® Demonstrator. All the Stampin’ Up! supplies used to make my card are available in my online store. Simply click any of the product photos below!