Color Inspiration

Blessings of Home Cards to Color

Love to color? This set of cards to color is just what you need. I find coloring is relaxing and helps me unwind, these are going to be fun to color. The inspiration for my project came from Chris Ann Tomasso, I absolutely loved her set of cards that she created. The pretty floral images are stamped with the Blessings of Home and Hand Penned Petals stamp sets. I love how well they go together.

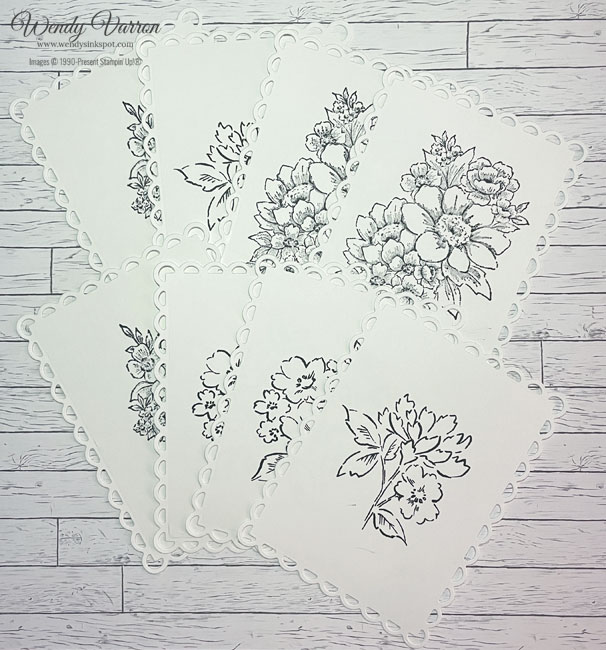
To create the Image on the front of the box and each of the cards inside, I die cut the largest scalloped rectangle with the Scallop Contour Dies on Basic White card stock. The pretty flower images are stamped in Memento ink and Stampin’ Blends to color the card for the front of the box. I stamped 2 of each of the flower images for the cards inside.

Now, lets decorate the box. I added a piece of Heart & Home DSP to a 4-1/4″ x 5-1/2″ Acetate Card box. Leaving the box flat I put a piece of Tear & Tape along the edge of the DSP to adhere to the box and wrapped it around, finishing with Tear & Tape on the other edge.

I added a some Fresh Freesia Open Weave Ribbon with Tear & Tape. To adhere the card front to the box I cut a few strips of a Foam Adhesive Sheet to give the card some stability when I attached it.

To finish the box, I tied a bow and attached it off to the side of the card with a Mini Glue Dot. Then added a few of my favorite Iridescent Rhinestone Basic Jewels. I love how they catch the light and shimmer.

I hope this inspires you to create some cards to color as well. All the Stampin’ Up! supplies used to make my project are available in my online store. Simply click any of the product photos below!

Product List

Happy Stamping!

Biggest Wish

My son’s birthday was this past Sunday. He is our youngest and has just turned 20! Where did that time go? Masculine cards are always challenging for me but I think this one turn out quite nice. The inspiration for this card came from the Annual Catalog. The colors, Granny Apple Green, Coastal Cabana, Bermuda Bay and Pacific Point, caught my eye as I was flipping though for inspiration.

Putting it all together

Once I pulled the ink pads out I decided to use the same colors in the Brights 6x 6″ Designer Series Paper Assortment. I cut strips of each color and adhered them to a piece of Basic White Cardstock. Then using my mini paper trimmer I trimmed up the strips to fit on my card.

I stamped Happy, from the Biggest Wish Stamp set, in alternating colors of Granny Apple Green, Coastal Cabana and Bermuda Bay on a strip of Basic White Cardstock. Photopolymer stamps make stamping this sentiment multiple times very easy. Once I placed the stip on the cardstock layer where I liked it, I added the Birthday sentiment in Pacific Point. I attached the carstock layer with the DSP strips to a Basic White Cardbase. Then I attached the sentiment strip with Stampin’ Dimensionals to my card and trimmed it down to fit my card.

To finish off my card, I of course had to add some bling. I used Stampin’ Blends to add a bit of color to a few Silver & Clear Epoxy Essentials to add to my card.

I’d love to be your Stampin’ Up!® Demonstrator. All the Stampin’ Up! supplies used to make my card are available in my online store. Simply click any of the product photos below!

Product List

Happy Stamping!

Gorgeous Leaves

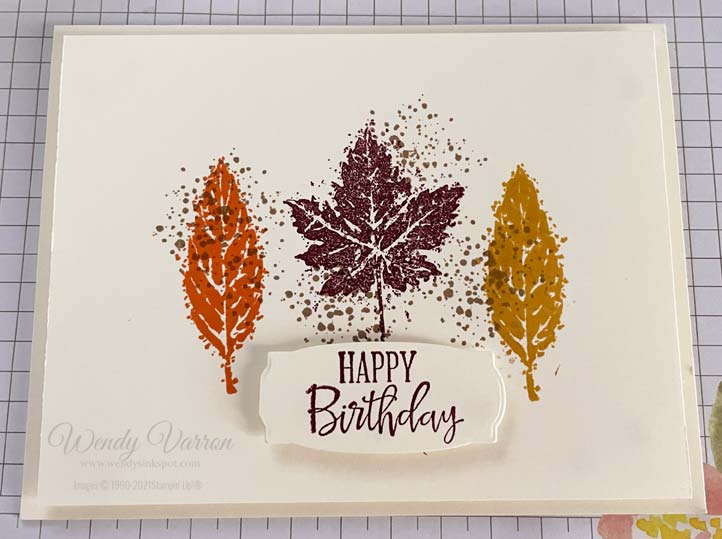
I have a bad habit of waiting until the last moment to make cards for special occasions. My husbands birthday earlier this month is a perfect example. I made this card the evening before his birthday, so I wanted to create a card quickly and without a lot of fuss. The Gorgeous Leaves stamp set was the perfect choice. The stamps are great on their own if you don’t want to use the Intricate Leaves Dies.

Once I decided on which stamp set to use it was time to decide on the colors to use. I love the colors of the leaves as they change in the fall. The tree right outside my window has a variation of red, orange and yellow leaves, so that was my inspiration for the color choice.

To start, I used the stamp with the splotches from the Gorgeous Leaves stamp set in Crumb Cake. Next, I stamped the leaves on top of the splotches. I started with the leaf in the center in Merry Merlot, then added the leaf in Pumpkin Pie and Bumblebee.

The Happy Birthday sentiment is from Peaceful Moments stamp set, I love the fonts in this set. Using the Message die, I die cut a set of blank labels with the Stampin’ Cut & Emboss machine on Very Vanilla cardstock, so that I have multiple blank labels to use later. I picked a label that would fit the sentiment and stamped it in Merry Merlot. Putting the card together i used Stampin’ Dimensionals for all the layers.

I’d love to be your Stampin’ Up! Demonstrator. All the Stampin’ Up! supplies used to make my card are available in my online store. Simply click any of the product photos below!

Gorgeous Leaves Card Measurements:

  • Very Vanilla Card Base: 5-1/2″ x 8-1/2″, scored in half at 4-1/4″
  • Very Vanilla layer: 4″ x 5-1/4″

Happy Stamping!

Color Challenge Inspiration

Today’s card was inspired by the Global Design Project for this week.

Confession: Orange or any shade of orange is not something I use regularly. I tend to use it only in the fall with pumpkins or leaves so this was a bit of challenge for me. I didn’t pay close enough attention to the colors in the challenge, I kind of glanced at them quickly and thought the Pale Papaya was So Saffron. I created the card below and then realized that I’d used the wrong color when I started this post. OOPS!

While I was designing this card I decided on a clean and simple layout using just stamps, ink and paper with a touch of bling. To create my cards I used Evening Evergreen for my card base and for the sentiment which is from the Create With Friends stamp set. The flowers are stamped on Basic White card stock with images from the Art Gallery Stamp set. I stamped the stems of my flowers in Soft Succulent first, then added the blossoms in Pale Papaya.

Once the blossoms were stamped I added in the Sentiment. Photopolymer stamps make placement very easy. I decided to rotate the card stock to fit the sentiment on the way I wanted it.

The Basic White card layer was attached to the base using Stampin’ Dimensionals. I use them on almost every project to add dimension. I added the new 2021-2023 In Color Jewels as the final touch to give this card just a little sparkle.

I hope this color challenge inspires you too!

Happy Stamping!

Product List

Scroll to Top