Mini Catalog

August Customer Thank you Cards

Welcome to our Stampin’ Up!® Demonstrator Training Program Monthly Blog Hop!

We are so happy that you could join us today for this blog hop for ideas and creative inspiration. Our blog hop focuses on the Thank You cards we are sending to our customers.

You may be starting here or have come from another blog – either way you can find the link list at the bottom of this post so that you can see every blog post today.

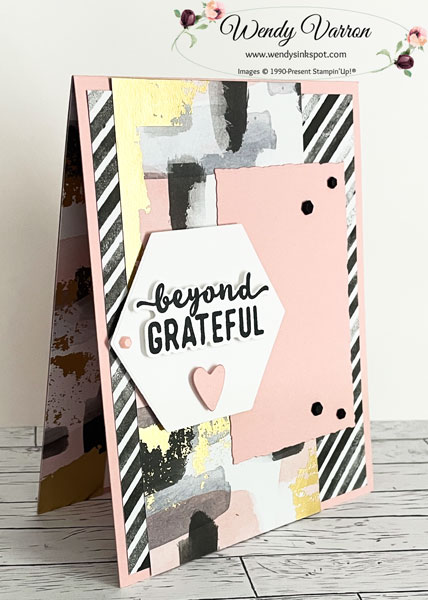
For this months Customer cards I decided to use the Splendid Day Designer Series Paper and the Beautiful Shapes Dies, to create a clean and simple card. I love how they turned out!

To create my card I cut card bases in both Soft Sea Foam and Fresh Freesia CardStock. Then I used the Beautiful Shapes Dies to die cut several hexagons from the Splendid Day Designer Series Paper. I adhered the 2 largest hexagons with multipurpose liquid glue, and the smallest hexagon with Mini Stampin’ Dimensionals on Basic White cardstock. I stamped several images from the Hello Beautiful Stamp set to add a bit of texture to the card, then attached the Basic White layer to the card base.

The sentiment is from the Pansy Patch stamp set, stamped in Tuxedo Black Ink, on a strip of Basic White cardstock. Then punched each side with the Lovely Labels Pick a Punch and added it to the card front with Stampin’ Dimensionals. I added a few of the 2021-2023 In Color Opal Rounds because I just couldn’t resist adding a little more sparkle to the cards.

For the inside of my card I stamped the Bee and foliage images from the Splendid Thoughts Stamp set on Basic White cardstock, then adhered it to the inside of the card.

Hello From Me to You Card Measurements:

  • Cardbase: 5-1/2″ x 8-1/2″, score at 4-1/4″
  • Basic White Layer: 4″ x 5-1/4″
  • Basic White Inside: 4′ x 5-1/4″
  • Basic White Strip for Sentiment: 1/2″ x 4″

I’d love to be your Stampin’ Up!® Demonstrator. All the Stampin’ Up! supplies used to make my card are available in my online store. Simply click any of the product photos below!

Happy Stamping!

Merriest Moments – Inspirations In Ink Blog Hop

Welcome to the Inspirations in Ink Blog Hop!

Thank you for hopping along with the Inspirations In Ink Blog Hop! This month’s theme is Christmas In July. You may be starting here or have come from another blog – either way you can find the link list at the bottom of this post so that you can see every blog post and idea today. I hope you enjoy all our Christmas in July Projects!

My Christmas in July card was created with just a few simple products that I had on hand. It was very easy and quick to create. It’s the perfect card if you send out lots of Holiday cards and you want to create multiples of a simple elegant card.

First I started with a Real Red cardstock cardbase, cut to 5-1/2″ x 8-1/2″, scored in half and folded at 4-1/4″. Next, using a piece of the Silver and Gold DSP from Sale-a-bration, I die cut the scalloped rectangle from the Scalloped Contours Dies and adhered it to my cardbase. Then using the next smallest scalloped rectangle die, I die cut a piece of the Gold Foil sheets and adhered it to the Gold DSP Layer.

I die cut the next smallest scalloped rectangle die cut from a piece of Real Red cardstock and using a Mini Glue Dot adhered a the snowflake from the Wonderful Snowflakes to the Red Scalloped rectangle. I stamped the sentiment from the Merriest Moments stamp set in Real Red Ink on a scrap of Basic White cardstock, then die cut it with a label from the Stylish Shapes Dies. I adhered it to the Red Scalloped rectangle, overlapping the snowflake a bit, with Stampin’ Dimensionals. Finally, I used Stampin’ Dimensionals to add the Red Scalloped rectangle to the Gold Foil layer on my card, and added a few Red Rhinestone Basic Jewels. Voila, a pretty Christmas card all ready to go!

As mentioned at the top, this is a blog hop so make sure you ‘hop’ around to all the amazing projects on this hop! Click on the links below to visit them.

I’d love to be your Stampin’ Up!® Demonstrator. All the Stampin’ Up! supplies used to make my card are available in my online store. Simply click any of the product photos below!

Happy Stamping!

Rainbow of Happiness – Inspirations In Ink Blog Hop

Welcome to the monthly Inspirations In Ink Blog Hop! This month’s theme is all about In Colors. You may be starting here or have come from another blog – either way you can find the link list at the bottom of this post so that you can see every blog post and idea today. I hope you enjoy all our In Color Blog Hop Projects!

Sweet Sorbet and Starry Sky are one of my favorite In Color combinations and are featured in my project. Rainbow of Happiness is one of the Bundles in the Jan-June Mini Catalog that I will miss so I wanted to use it in my project before it retires on June 30th.

To create my card I started with the Sweet Sorbet cardbase from the Tea Boutique Cards & Envelopes. I die cut several of the rainbow stripes in Sweet Sorbet and Starry Sky 6″x 6″ DSP Assortment. Then, I adhered them to a piece of Basic White cardstock and die cut the cardstock with the 2nd largest rectangle in the Deckled Rectangles Dies.

I used the Cloud Punch to punch out a Basic White Cloud and a Vellum Cloud. Then snipped the Vellum Cloud in half and adhered it to the back of the Basic White Cloud with Mini Glue Dots. I used Stampin’ Dimensionals to attach it to the rainbow.

The label is die cut with the Tailor Made Tags dies. I used Masking Paper to cover up “World” and stamped the sentiment in Sweet Sorbet. Then masking the stamp again stamped “World” in Starry Sky.

I tied a piece of Starry Sky Metallic Woven Ribbon to the top of the tag and then attached it to the Basic White layer with Mini Glue Dots.

To put all the layers together, I adhered a piece of the Lovely Layers Vellum with Multipurpose glue to the cardbase. Then added the Basic White layer with Stampin’ Dimensionals. I added a few of the Iridescent Jewels to the front of the card and stamped some hearts to the inside of the card.

As mentioned at the top, this is a blog hop so make sure you ‘hop’ around to all the amazing projects on this hop! Click on the links below to visit them.

Rainbow of Happiness In Color Card Measurements:

  • Tea Boutique Cards & Envelopes Cardbase 5-1/2″ x 8-1/2″ score in half at 4-1/4″
  • Lovely Layers Vellum 3-3/4″ x 5″

I’d love to be your Stampin’ Up!® Demonstrator. All the Stampin’ Up! supplies used to make my card are available in my online store. Simply click any of the product photos below!

Happy Stamping!

Demonstrator Training Program Blog Hop – June Customer Thank Yous

Thank you for joining us for our Stampin’ Up!® Demonstrator Training Program Monthly Blog Hop! We are so happy that you could join us today for this blog hop of ideas and creative inspiration. We are a group of Stampin’ Up!® Demonstrators from around the world that are taking part in training that is helping us to build a successful Stampin’ Up!® business and reach some goals we have set. You may be starting here or have come from another blog – either way you can find the link list at the bottom of this post so that you can see every blog post and idea today.We really appreciate your support.

My Customer Thank You cards this month feature the Charming Sentiments Bundle and Abstract Beauty DSP. If you’ve been following me you know that I love an eye catching and easy to create card. This pretty card is no exception, and this card layout is also great for showing off Designer Series Paper.

To create this card I cut a piece of Blushing Bride Cardstock to 4-1/4″ x 11″ and scored it in half at 5-1/2″. I adhered a 4″ x 5-1/4″ piece of Abstract Beauty DSP to the card base. Next, I adhered a 2-3/4″ x 5-1/2″ piece of Abstract Beauty DSP. I die cut a piece of Blushing Bride cardstock using the Deckled Rectangles Dies and adhered it to the card.

To Create the label, I die cut the hexagon with the Beautiful Shapes Dies. Then using the Charming Sentiments stamp set, I stamped the sentiment in Tuxedo Black Memento Ink and die cut it with the Charming Sentiments Dies. I love the extra shapes that are included with the Charming Sentiments Dies and cut out the Blushing Bride heart. I added the sentiment and heart to the hexagon with Stampin’ Dimensionals, then added the hexagon with Stampin’ Dimensionals as well. To finish the front of my card I added a few Adhesive Backed Hexagons.

On the inside of my card I added a piece of Basic White DSP and Abstract Beauty DSP. This strip of Abstract Beauty DSP is the scrap left over from the same pattern I used on the card front, trimmed to 1″ x 5-1/2″. I wanted us use up my pack of Abstract Beauty DSP before it retires at the end of the month, so I created several in one batch.

As mentioned at the top, this is a blog hop so make sure you ‘hop’ around to all the amazing projects on this hop! Click on the links below to visit them.

Beyond Grateful Card Measurements:

  • Card base:4-1/4″ x 11″, score in half at 5-1/2″
  • DSP Layer: 4″ x 5-1/4″
  • DSP Layer: 2-3/4″ x 5-1/2″
  • Basic White Inside Card: 4″ x 5-1/4″
  • DSP Strip inside Card: 1″ x 51/2″

I hope you enjoyed my cards. If you need any of the supplies to make these thank you cards, I’d love to be your Stampin’ Up!® Demonstrator. All the Stampin’ Up! supplies used to make my card are available in my online store. Simply click any of the product photos below!

Happy Stamping!

Flowering Tulips Bundle

The Flowering Tulips Bundle embodies everything beautiful about spring: joy, hope, and brighter days ahead! Use the coordinating stamps and dies to create a single flower with fluttering petals or layer flowers and stems for a show-stopping bouquet of color.

Mother’s Day is just around the corner! What better way to send your love than with a bouquet of colorful tulips?

There’s no need to tiptoe around these tulips: stamp, die cut, and embellish them to your heart’s content! When Mother’s Day is over, this duo is perfect for year-round, all-occasion cardmaking.

Flowering Tulips Bundle is part of a larger suite of products, a gorgeous tulip-themed Designer Series Paper, miniature brass butterflies, a lovely accent ribbon, plus more stamps and dies! You can find them in my online store, click here.

Happy Stamping!

Easter Friends – Luv 2 Stamp Group’s Blog Hop

Welcome to the Luv 2 Stamp Group’s Blog Hop!

We are excited to share projects with you again this year. We hope to inspire you to create beautiful new projects. Each month we will have a different theme based on the next month’s celebrations using Stampin’ Up! products.

Once you are done with each post, scroll down to the bottom and you will see a list of Blog Hop participants, you can click on their name to go to their post, or you can click the next button to go to the next post in line. Happy crafting! This month’s theme is Easter.

For this month’s Easter theme my cards feature the cute bunny in the Easter Friends Stamp Set. I decided to try something a little different using Watercolor Paper and Watercolor Painters. The grass was created using Granny Apple Green and Garden Green reinkers by brushing the color with Watercolor Painters along the bottom of the Watercolor Paper.

Then using a Blending Brush and Balmy Blue Ink pad I brushed the ink onto the watercolor paper to create the sk. Using the 2021-2023 In Color Shimmer Vellum and the Peach Dies, I added a few little flowers with Mini Glue Dots. Then layered the Watercolor cardstock on Soft Seafoam Cardstock and then on a So Saffron and Balmy Blue card base.

I stamped a couple of bunnies in Gray Granite and Smoky Slate on Basic White cardstock. I used the Light Flirty Flamingo Blends to color in the bunny nose, then fussy cut them out. I’ve added them to my card with Stampin’ Dimensionals. The sentiment is stamped in Tuxedo Black on Vellum. I trimmed them down and punched the end of the strip with the Banners Pick a Punch. I put 2 Mini Glue dots on the back of the Vellum by rolling the up into tiny little strips and placing them behind the H in Happy and the S in Easter. To finish them off I added a few Iridescent Rhinestone Jewels.

For more inspiration from the Luv 2 Stamp Group Blog Hop Team, click on the image below to visit the talented Patty Bennett. Don’t forget to continue following links on each blog to see everyone’s projects!

Easter Friends Card Measurements:

  • So Saffron Cardbase: 5-1/2″ x 8-1/2″, score in half at 4-1/4″
  • Watercolor Cardstock: 4′ x 5-1/4″
  • Soft Seafoam Cardstock: 4-1/8″ x 5-3/8″

Thank you so much for hopping by today! All the Stampin’ Up! supplies used to make my card are available in my online store. Simply click any of the product photos below!

Product List

Happy Stamping!

Scroll to Top