Blog Hop

Demonstrator Training Program Blog Hop- Go To Greetings

Welcome to the Demonstrator Training Program Blog Hop!

We are so happy that you could join us today for this blog hop for ideas and creative inspiration. We are a group of Stampin’ Up!® Demonstrators from around the world that are taking part in training that is helping us to build a successful Stampin’ Up!® business and reach some goals we have set. We really appreciate your support.

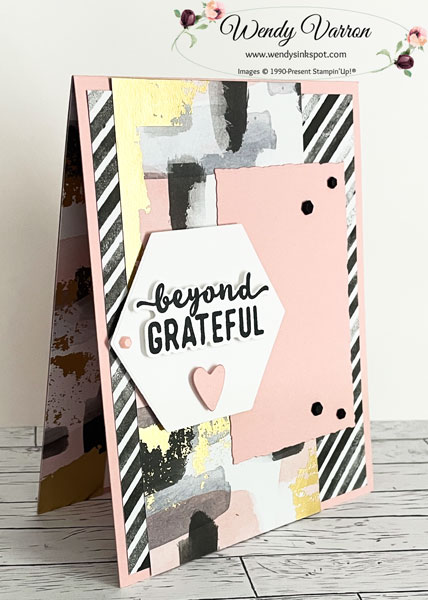
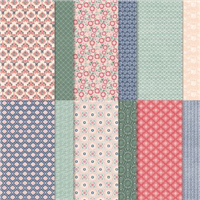
For this months Customer Thank You cards I wanted to highlight the Hues of Happiness Designer Series Paper. This is one of my favorite Designer Series Paper Packs in the Annual Catalog. I love all the beautiful colors and flowers so I used a few different patterns of this DSP to create my thank you cards.

To create my cards, I selected the patterns of DSP first then the colors of cardstock and ink to complement the pretty paper. I love how they turned out. I cut all the cardstock for the card bases, the cardstock layer and the DSP and adhered the layers together. Then I stamped the Thank You sentiment using the Go To Greetings stamp set and die cut them with the label from the Natural Prints dies. The contrasting cardstock behind the labels was created using a circle and banner from the Stylish Shapes Dies.

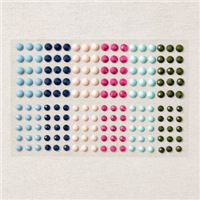
I adhered the sentiment to the circle, then adhered the circle to the banner. I used Stampin’ Dimensionals to adhere the labels to the card. I added a few Glossy Dots to give it a little sparkle.

I used Masking Paper to create the image for the inside of the card. I stamped a flower from the Happiness Abounds Stamp set on Basic White Cardstock. Stamped the same image on masking paper and fussy cut it out. I put it over my stamped flower image and then stamped the leaves. I used Sponge Daubers to add some color to the flowers and leaves.

You may be starting here or have come from another blog – either way you can find the link list at the bottom of this post so that you can see every blog post today.

Customer Thank You Card Measurements:

  • Cardbase: 5-1/2″ x 8-1/2″, score and fold in half at 4-1/4″
  • Cardstock Layer: 3-3/4″ x 5″
  • Hues of Happiness DSP: 3-1/2″ x 4-3/4″
  • Basic White Inside Layer: 4″ x 5-1/4″

I’d love to be your Stampin’ Up!® Demonstrator. All the Stampin’ Up! supplies used to make my card are available in my online store. Simply click any of the product photos below!

Happy Stamping!

Demonstrator Training Program Blog Hop- Go To Greetings Read More »

Demonstrator Training Program Blog Hop – June Customer Thank Yous

Thank you for joining us for our Stampin’ Up!® Demonstrator Training Program Monthly Blog Hop! We are so happy that you could join us today for this blog hop of ideas and creative inspiration. We are a group of Stampin’ Up!® Demonstrators from around the world that are taking part in training that is helping us to build a successful Stampin’ Up!® business and reach some goals we have set. You may be starting here or have come from another blog – either way you can find the link list at the bottom of this post so that you can see every blog post and idea today.We really appreciate your support.

My Customer Thank You cards this month feature the Charming Sentiments Bundle and Abstract Beauty DSP. If you’ve been following me you know that I love an eye catching and easy to create card. This pretty card is no exception, and this card layout is also great for showing off Designer Series Paper.

To create this card I cut a piece of Blushing Bride Cardstock to 4-1/4″ x 11″ and scored it in half at 5-1/2″. I adhered a 4″ x 5-1/4″ piece of Abstract Beauty DSP to the card base. Next, I adhered a 2-3/4″ x 5-1/2″ piece of Abstract Beauty DSP. I die cut a piece of Blushing Bride cardstock using the Deckled Rectangles Dies and adhered it to the card.

To Create the label, I die cut the hexagon with the Beautiful Shapes Dies. Then using the Charming Sentiments stamp set, I stamped the sentiment in Tuxedo Black Memento Ink and die cut it with the Charming Sentiments Dies. I love the extra shapes that are included with the Charming Sentiments Dies and cut out the Blushing Bride heart. I added the sentiment and heart to the hexagon with Stampin’ Dimensionals, then added the hexagon with Stampin’ Dimensionals as well. To finish the front of my card I added a few Adhesive Backed Hexagons.

On the inside of my card I added a piece of Basic White DSP and Abstract Beauty DSP. This strip of Abstract Beauty DSP is the scrap left over from the same pattern I used on the card front, trimmed to 1″ x 5-1/2″. I wanted us use up my pack of Abstract Beauty DSP before it retires at the end of the month, so I created several in one batch.

As mentioned at the top, this is a blog hop so make sure you ‘hop’ around to all the amazing projects on this hop! Click on the links below to visit them.

Beyond Grateful Card Measurements:

  • Card base:4-1/4″ x 11″, score in half at 5-1/2″
  • DSP Layer: 4″ x 5-1/4″
  • DSP Layer: 2-3/4″ x 5-1/2″
  • Basic White Inside Card: 4″ x 5-1/4″
  • DSP Strip inside Card: 1″ x 51/2″

I hope you enjoyed my cards. If you need any of the supplies to make these thank you cards, I’d love to be your Stampin’ Up!® Demonstrator. All the Stampin’ Up! supplies used to make my card are available in my online store. Simply click any of the product photos below!

Happy Stamping!

Demonstrator Training Program Blog Hop – June Customer Thank Yous Read More »

Demonstrator Training Program Blog Hop May 2022-Lovely and Lasting

Thank you for joining us for our Stampin’ Up!® Demonstrator Training Program Monthly Blog Hop! We are so happy that you could join us today for this blog hop for ideas and creative inspiration. We are a group of Stampin’ Up!® Demonstrators from around the world that are taking part in training that is helping us to build a successful Stampin’ Up!® business and reach some goals we have set. We really appreciate your support.

You may be starting here or have come from another blog – either way you can find the link list at the bottom of this post so that you can see every blog post and idea today.

I’m featuring a few of the products from the Lovely in Linen Suite for my Customer Thank You Cards this month! The Lovely & Lasting Bundle & Lovely In Linen Designer Series Paper. I love that the Lasting Label punch coordinates perfectly with the Lovely & Lasting Stamps and all the pretty colors in the Designer Series Paper.

To create these lovely cards, I prepped all the elements needed before I put them all together. I’ve listed all the measurements below. Don’t forget, before cutting your Lovely In Linen DSP, pay attention to the direction of the pattern.

To put the card front together, start with adhering the DSP strips to the card base. I started with the strip on the bottom right, then worked my way around.

To create the center layer I stamped the flower image in Night of Navy Ink on the 1-3/4″ x 3″ Basic White CS. Then adhered it to the 1-7/8″ x 3-1/8″ Payle Papaya CS layer, before adding it to the card.

Next I stamped the label in Payle Papaya and punch it out with the Lasting Label punch. Using Stampin’ Dimensionals I added it to the front of my card. Then I added a few of the shiny new Solid Faceted Gems.

Don’t forget to dress up the inside of your card!

I cut a 3/4″ x 5-1/4″ strip of DSP and adhere it to the Basic White Cardstock, then stamped the fancy swirl in Night of Navy.

Thanks so much for stopping by today!
As mentioned at the top, this is a blog hop so make sure you ‘hop’ around to all the amazing projects on this hop! Click on the links below to visit them.

Do you need any of the products used on my project? See the product list below, simply check any of the images to shop.

Lovely & Lasting Thank You Card Measurements:

  • Cardbase: 5-1/2″ x 8-1/2″, score in half at 4-1/4″
  • DSP: (2) 1″ x 3″ (pay attention to the direction of the DSP when cutting)
  • DSP: (2) 1″ x 4-1/4″ (pay attention to the direction of the DSP when cutting)
  • Whisper White CS for Center: 1-3/4″ x 3″
  • Color CS for Center: 1-7/8″ x 3-1/8″
  • Whisper White CS for Inside: 4″ x 5-1/4″
  • DSP for Inside: 3/4″ x 5-1/4″

All the Stampin’ Up! supplies used to make my card are available in my online store. Simply click any of the product photos below!

Happy Stamping!

Demonstrator Training Program Blog Hop May 2022-Lovely and Lasting Read More »

Scroll to Top