Mini Catalog

Reserve Your 2022 Paper Share

Reservations now open for the January – June 2022 mini catalog Paper Share!

What is a Paper Share?

A Paper Share is a sampling of new designer paper from Stampin’ UP!  It allows you to see and use the paper before buying the full packs of your favorites!  When you reserve a designer series paper share with me, I will order all of the new paper from the latest Stampin’ Up! catalog, cut it up, package it, label it, and reship it to you so that you have a sampling of all of the new papers listed in this post.  This is usually about 1/4th the cost of purchasing all of the new paper packs yourself. This way you can see and use the paper, then reorder your favorites in my online store.

January – June 2022 Mini Catalog Paper Share Includes:

96 pieces of Designer Paper from 8 packs of designer paper from the 2022 Stampin’ UP! Jan-June Mini catalog.

Cost:  $33.00 per paper share + $8.55 Priority Padded Flat Rate Shipping (includes tracking)

Your Paper Share of 96 pieces includes 1/4 pack of each of the following:

  • Abstract Beauty Specialty DSP 4″ x 6″ (12 sheets) (New Size! 4×6 pack!)
  • Artfully Composted DSP 6″ x 6″ (12 sheets)
  • Flowering Fields DSP 6″ x 6″ (12 sheets)
  • Heart & Home DSP 6″ x 6″ (12 sheets)
  • Hey Sports Fan DSP 6″ x 6″ (12 sheets)
  • New Horizons DSP 6″ x 6″ (12 sheets)
  • Sweet Talk DSP 6″ x 6″ (12 sheets)
  • Symbols of Fortune Specialty DSP 6″ x 6″ (12 sheets)

IMPORTANT:  if you do not receive an email confirmation from me within 24 hours of signing up, please contact me here.

I will put you on the reservation list and email a PayPal Invoice* on December 28, 2021

U.S. Addresses Only.

Deadline to PAY:  January 2, 2022

*if you don’t have PayPal, you can pay the invoice with your credit or debit card when you receive the invoice

Please double check your address on your PayPal account – I am not responsible for misdirected packages due to wrong addresses on your account. Thank you!

Paper Share Schedule:

  • December 28, 2021 Wendy will email a PayPal Invoice to everyone who has reserved a paper share
  • January 2, 2022: deadline to pay – this offer is now closed on Jan. 2
  • January 4, 2022: Wendy will order all the paper
  • January 12 to 19, 2022: Wendy will cut, label, bag and package all paper shares
  • January 20-22, 2022: Wendy will ship paper shares (assuming there are no backorders)

Happy Stamping!

Reserve Your 2022 Paper Share Read More »

Gorgeous Leaves

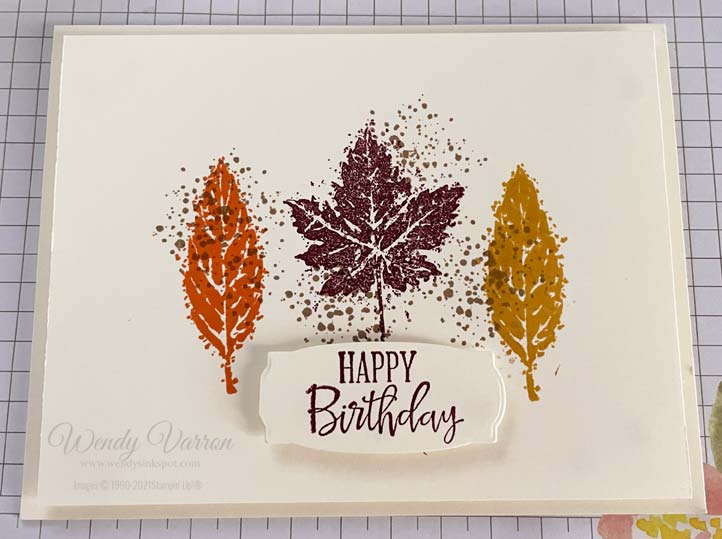
I have a bad habit of waiting until the last moment to make cards for special occasions. My husbands birthday earlier this month is a perfect example. I made this card the evening before his birthday, so I wanted to create a card quickly and without a lot of fuss. The Gorgeous Leaves stamp set was the perfect choice. The stamps are great on their own if you don’t want to use the Intricate Leaves Dies.

Once I decided on which stamp set to use it was time to decide on the colors to use. I love the colors of the leaves as they change in the fall. The tree right outside my window has a variation of red, orange and yellow leaves, so that was my inspiration for the color choice.

To start, I used the stamp with the splotches from the Gorgeous Leaves stamp set in Crumb Cake. Next, I stamped the leaves on top of the splotches. I started with the leaf in the center in Merry Merlot, then added the leaf in Pumpkin Pie and Bumblebee.

The Happy Birthday sentiment is from Peaceful Moments stamp set, I love the fonts in this set. Using the Message die, I die cut a set of blank labels with the Stampin’ Cut & Emboss machine on Very Vanilla cardstock, so that I have multiple blank labels to use later. I picked a label that would fit the sentiment and stamped it in Merry Merlot. Putting the card together i used Stampin’ Dimensionals for all the layers.

I’d love to be your Stampin’ Up! Demonstrator. All the Stampin’ Up! supplies used to make my card are available in my online store. Simply click any of the product photos below!

Gorgeous Leaves Card Measurements:

  • Very Vanilla Card Base: 5-1/2″ x 8-1/2″, scored in half at 4-1/4″
  • Very Vanilla layer: 4″ x 5-1/4″

Happy Stamping!

Gorgeous Leaves Read More »

Edens Garden

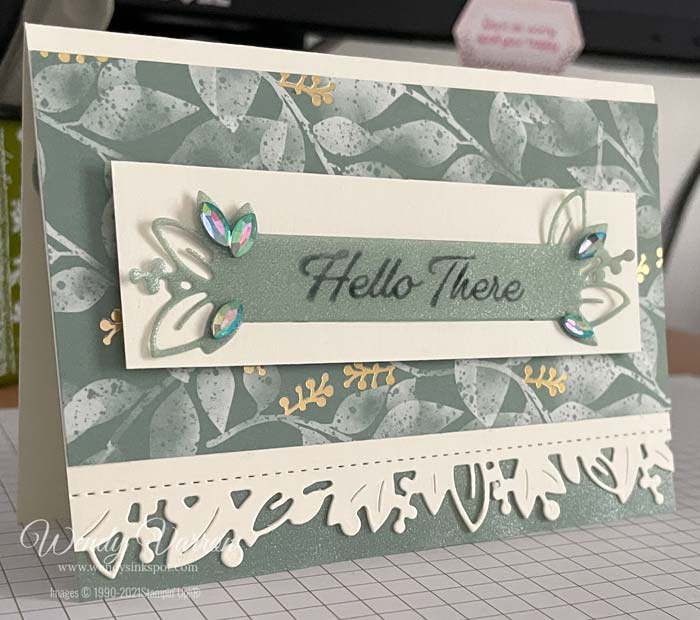
The Eden’s Garden Suite is one of my favorite Suites. I love the colors of the Ever Eden Designer Series Paper as well as the sentiments and images in the Eden’s Garden Cling Stamp set. And of course, I can’t forget the Garden Gems. If the specialty papers and gems in this suite are on your wishlist, they are only available while supplies last, don’t wait to order them, as they will not be in the January – July 2022 Mini Catalog.

Putting it all together

Using several pieces of Washi Tape to hold the die in place, I die cut the edge of my note card with the Eden Die to make this pretty edge. I added a piece of the In Color Shimmer Vellum on the inside of the card. It’s such a pretty effect against the die cut edge. Then added a piece of the Ever Eden DSP.

The sentiment was stamped on a piece of the In Color Shimmer Vellum with Staz On Ink, then die cut with the label from the Eden Dies. I adhered it to a piece of Very Vanilla cardstock, and using Stampin’ Dimensionals attached it to to the card. Finally, I added a few of the Garden Gems to give it a bit of bling.

Let me know in the comments below how you like today’s card. I’d love to be your Stampin’ Up! Demonstrator. All the Stampin’ Up! supplies used to make my card are available in my online store. Simply click any of the product photos below!

Eden’s Garden Card Measurements

  • Card base: Very Vanilla Note card or Cardstock cut to 5″ x 7″, scored in half at 3-1/2″
  • Ever Eden DSP: 2-1/2″ x 5″
  • In Color Shimmer Vellum: 3-1/2″ x 5″
  • Very Vanilla Cardstock: 1-1/4″ x 4-1/4″

Happy Stamping!

Edens Garden Read More »

Holly Jolly Wishes

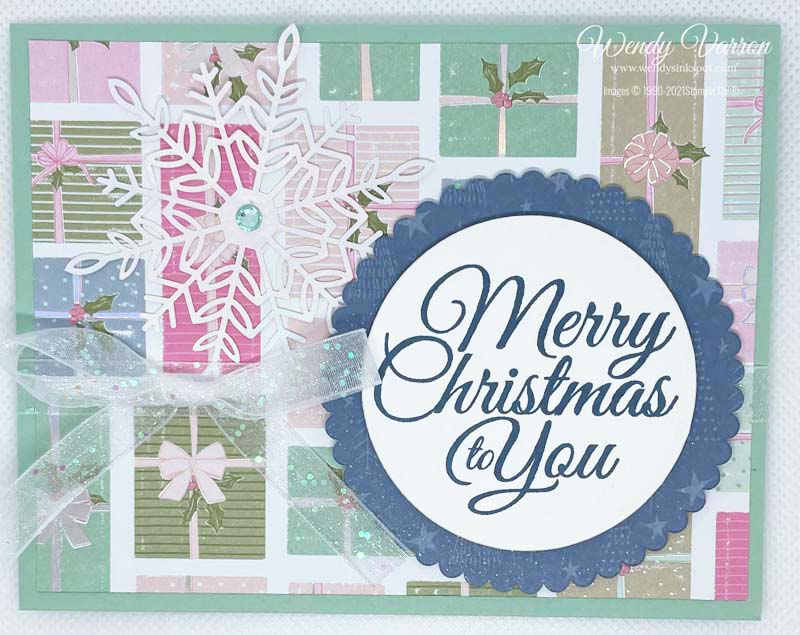
I usually prefer traditional colors of red, green and white for Christmas cards but just couldn’t resist making a card with the Holly Jolly Wishes Cling Stamp set & the Whimsy & Wonder DSP. I love the colors in this DSP, and the iridescent foil in the patterns give it the perfect touch of bling!

I started with a Mint Macaron card base and added a layer of the Whimsy & Wonder DSP. I love the packages in this pattern. In keeping with the pattern of the DSP, I added the Glittered Organdy Ribbon wrapped around the top of the card like a package.

I added one of the Wonderful Snowflakes, which are part of the Whimsy & Wonder Suite Collection. It coordinates beautifully with the Whimsy & Wonder DSP. Then I stamped the sentiment in Misty Moonlight on Basic White cardstock. Using the Layering Circles Dies, I die cut the sentiment and layered it on a scallop circle that I die cut from the Whimsy & Wonder DSP. I really like the subtle look of the pattern on the DSP showing.

To finish my card I added an In Color Jewel to the Snowflake and tied the ribbon bow and attached it to the card with a glue dot. And last but not least, I brushed a Wink of Stella on the Misty Moonlight scalloped circle.

I hope you enjoyed my card today. Thanks so much for stopping by!

Card Measurements:

  • Card base: 5-1/2″x 8-1/2″, score in half at 4-1/4″
  • DSP layer: 4′ x 5-1/4″

Happy Stamping!

Holly Jolly Wishes Read More »

Candy Canes

I love candy canes at Christmas. During the holidays I keep them on my desk at work, I put them on the Christmas tree and we alway have extras so I’m usually still enjoying them after Christmas.

Of course I had to have the new Candy Cane background stamp available in the July – August Mini Catalog. It’s the perfect stamp for simple stamping with just ink, stamps and paper. I have found that the best way for me to get a clear image when using a background stamp is to use my Stamparatus. It allows me to stamp multiple times without fear of not lining up the image correctly. It was so easy I decided to make one with Real Red and one with Garden Green.

The sentiment I choose for these cards is from the Frosted Gingerbread stamp set, with pairs perfectly with this background stamp. To dress the card up a bit I used a bit of Gold Foil Specialty paper with the sentiment layer. It was quick and easy to put these simple, cute cards together.

Candy Cane Card Measurements:

  • Real Red Card Base: 5 ½ x 8 ¼”, score at 4 ¼”
  • Basic White Cardstock: 4 x 5 ¼”, 1 ½ x 2″
  • Real Red Cardstock: 1 ¾ x 2 ¼”
  • Gold Foil: 1 5/8 x 2 1/8″

Product List

Happy Stamping,

Candy Canes Read More »
Tag Buffet

Today I want to share with you how I used a few of the tags from the Tag Buffet Kit in the August-December 2020 Mini Catalog.

 Not only do I make Christmas cards to send out but I also make all the gift tags that we use each year. 

As I was making the tags from the kit, I decided to use them to dress up a few gift boxes. 


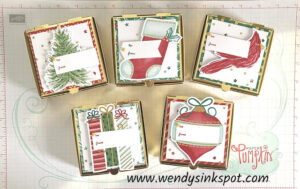
The Gold Mini Pizza boxes are the perfect size for some tasty treats or a small gift. They are also the perfect size for the tags in the Tag Buffet Kit with just a bit of trimming. 


The base layer of the tag is 3 1/4″, exactly what I needed for the Pizza Box. I trimmed bit off the top of the tag so that it measures 3 1/4″x 3 1/4″. The white layer is 3″ wide, so I trimmed a bit off the top again so that it measures 3″ x 3″.   


Once they were trimmed to the perfect size I layered them with some Multi Purpose glue and used Stampin’ Dimensionals to pop the tree up. 


Using the small tag from the Tag Buffet Kit I stamped the “To” & “From” using a stamp from the Little Treats Stamp set. I wanted this little tag to be a little off center, so I added Stampin’ Dimensionals on the end to keep it popped up with the tree and some Multipurpose Glue to make sure it adhered to the tree. 

To dress it up a bit I added a few little yellow stars from the All The Trimming embellishments. Then the Tag was attached to the Pizza box with a bit of glue. I love how they turned out.

The Tag Buffet Kit  and All The Trimmings Embellishments are on sale now during the Year-End Close Out, now is the perfect time to snatch them up for next year! 


Thanks so much for stopping by today! 

Happy Stamping,

Tag Buffet Read More »

Welcome to my blog!

Welcome and thank you for visiting my blog! I am excited to share my love of stamping with you. I was introduced to Stampin’ Up! in 2009 and I was hooked after I made my first card. I love that Stampin’Up! products color coordinate from the cardstock to the Designer Series paper to ink and embellishments. 

You’re just in time to see a few sneak peaks of some really cute and amazing products coming in January in the January – June 2021 Mini Catalog. So without further ado…..


This monochromatic card was made with a the Dandy Laser Cut Paper. I layered the card front on a piece of Whisper White Cardstock. Using a Blender Brush I added some Mint Macaron ink to create a stencil look. The bristles on the Blender Brush very soft which makes them easy to use on a the delicate laser cut card front without bending or tearing it. I’ll be able to use it again.


First I inked the cardstock, then, I trimmed away the white border. 
To put the card together, I adhered the inked card stock with Stampin’ Seal on to another piece of Whisper White cut about a 1/2″ larger for a framed look. Then, I add a piece of Silver Metallic Edge ribbon, attaching it to the back of the Whisper White layer before adhering it to the card base. 
 
The sentiment, from the Enjoy the Moment Stamp set, is stamped in Mint Macaron and die cut with the Stitched So Sweetly dies. I popped it up with my favorite adhesive Stampin’ Dimensionals.  This was an easy card to make with just a few supplies. 


Product List

Happy Stamping,

Welcome to my blog! Read More »

Scroll to Top