Simple Stamping

Merriest Moments – Inspirations In Ink Blog Hop

Welcome to the Inspirations in Ink Blog Hop!

Thank you for hopping along with the Inspirations In Ink Blog Hop! This month’s theme is Christmas In July. You may be starting here or have come from another blog – either way you can find the link list at the bottom of this post so that you can see every blog post and idea today. I hope you enjoy all our Christmas in July Projects!

My Christmas in July card was created with just a few simple products that I had on hand. It was very easy and quick to create. It’s the perfect card if you send out lots of Holiday cards and you want to create multiples of a simple elegant card.

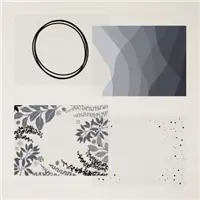
First I started with a Real Red cardstock cardbase, cut to 5-1/2″ x 8-1/2″, scored in half and folded at 4-1/4″. Next, using a piece of the Silver and Gold DSP from Sale-a-bration, I die cut the scalloped rectangle from the Scalloped Contours Dies and adhered it to my cardbase. Then using the next smallest scalloped rectangle die, I die cut a piece of the Gold Foil sheets and adhered it to the Gold DSP Layer.

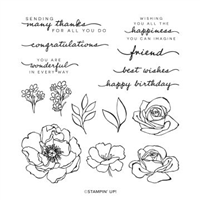
I die cut the next smallest scalloped rectangle die cut from a piece of Real Red cardstock and using a Mini Glue Dot adhered a the snowflake from the Wonderful Snowflakes to the Red Scalloped rectangle. I stamped the sentiment from the Merriest Moments stamp set in Real Red Ink on a scrap of Basic White cardstock, then die cut it with a label from the Stylish Shapes Dies. I adhered it to the Red Scalloped rectangle, overlapping the snowflake a bit, with Stampin’ Dimensionals. Finally, I used Stampin’ Dimensionals to add the Red Scalloped rectangle to the Gold Foil layer on my card, and added a few Red Rhinestone Basic Jewels. Voila, a pretty Christmas card all ready to go!

As mentioned at the top, this is a blog hop so make sure you ‘hop’ around to all the amazing projects on this hop! Click on the links below to visit them.

I’d love to be your Stampin’ Up!® Demonstrator. All the Stampin’ Up! supplies used to make my card are available in my online store. Simply click any of the product photos below!

Happy Stamping!

Merriest Moments – Inspirations In Ink Blog Hop Read More »

Rainbow of Happiness – Inspirations In Ink Blog Hop

Welcome to the monthly Inspirations In Ink Blog Hop! This month’s theme is all about In Colors. You may be starting here or have come from another blog – either way you can find the link list at the bottom of this post so that you can see every blog post and idea today. I hope you enjoy all our In Color Blog Hop Projects!

Sweet Sorbet and Starry Sky are one of my favorite In Color combinations and are featured in my project. Rainbow of Happiness is one of the Bundles in the Jan-June Mini Catalog that I will miss so I wanted to use it in my project before it retires on June 30th.

To create my card I started with the Sweet Sorbet cardbase from the Tea Boutique Cards & Envelopes. I die cut several of the rainbow stripes in Sweet Sorbet and Starry Sky 6″x 6″ DSP Assortment. Then, I adhered them to a piece of Basic White cardstock and die cut the cardstock with the 2nd largest rectangle in the Deckled Rectangles Dies.

I used the Cloud Punch to punch out a Basic White Cloud and a Vellum Cloud. Then snipped the Vellum Cloud in half and adhered it to the back of the Basic White Cloud with Mini Glue Dots. I used Stampin’ Dimensionals to attach it to the rainbow.

The label is die cut with the Tailor Made Tags dies. I used Masking Paper to cover up “World” and stamped the sentiment in Sweet Sorbet. Then masking the stamp again stamped “World” in Starry Sky.

I tied a piece of Starry Sky Metallic Woven Ribbon to the top of the tag and then attached it to the Basic White layer with Mini Glue Dots.

To put all the layers together, I adhered a piece of the Lovely Layers Vellum with Multipurpose glue to the cardbase. Then added the Basic White layer with Stampin’ Dimensionals. I added a few of the Iridescent Jewels to the front of the card and stamped some hearts to the inside of the card.

As mentioned at the top, this is a blog hop so make sure you ‘hop’ around to all the amazing projects on this hop! Click on the links below to visit them.

Rainbow of Happiness In Color Card Measurements:

  • Tea Boutique Cards & Envelopes Cardbase 5-1/2″ x 8-1/2″ score in half at 4-1/4″
  • Lovely Layers Vellum 3-3/4″ x 5″

I’d love to be your Stampin’ Up!® Demonstrator. All the Stampin’ Up! supplies used to make my card are available in my online store. Simply click any of the product photos below!

Happy Stamping!

Rainbow of Happiness – Inspirations In Ink Blog Hop Read More »

Speedy Recovery – Luv 2 Stamp Group Blog Hop

Welcome to the Luv 2 Stamp Group’s 2022 Blog Hop!

We hope you enjoy our New Annual Catalog Theme!

We are excited to share projects with you again this year. We hope to inspire you to create beautiful new projects using Stampin’ Up! products.

Once you are done with each post, scroll down to the bottom and you will see a list of Blog Hop participants, you can click on their name to go to their post, or you can click the next button to go to the next post in line. Happy crafting!

My project features the Speedy Recover Stamp set. I love how the flower stamp works so well with the Awash In Beauty DSP. This easy fun fold starts with a note card from the Note Card & Envelopes. Score the front panel of the card at 1-3/4″ and fold it back.

Cut 2 pieces of Awash In Beauty DSP to 1-1/2″ x 4-3/4″ and adhere to the the front panel and the inside of the front panel. Cut another piece of Awash In Beauty DSP to 3-1/4″ x 4-3/4″ and adhere to the inside of the cardbase. I used the same pattern for both of the 1-1/2″ x 4-3/4″ pieces of DSP but you could choose 3 different patterns to show of the pretty paper.

Next, I die cut 2 of the largest circles from the Basic Shapes Dies. For the front label I stamped the flower image with Tuxedo Black Memento Ink and colored in the image with Stampin’ Blends. Then I stamped the greeting. To create the wrap around the flowers, I stamped the same flower image a second time on a scrap of Basic White Cardstock in Rich Razzleberry. Then, I snipped out just the wrap and adhered it over top of the stamped image on my label.

Be sure when adhering the label to the front of the card you only want to add adhesive to one side of the label so the card will open. You don’t want to make a mistake and put adhesive on the entire label or your card won’t open.

Adhere the second circle to the inside of the card right behind the front label so when the card is closed you don’t see it. To finish up my card I added a few Iridescent Pearl Basic Jewels to my card. Below are a few other variations of my card.

For more inspiration from the Luv 2 Stamp Group Blog Hop Team, click on the image below to visit the talented Patty Bennett. Don’t forget to continue following links on each blog to see everyone’s projects!

Sending Well Wishes Card Measurements:

  • Basic White Cardbase: Use a Note Card from the Note Cards & Envelopes pack which measures 5″ x 7″, scored in half at 3-1/2″
  • Awash In Beauty DSP: (2) 1-1/2″ x 4-3/4″
  • Awash In Beauty DSP: 3-1/4″ x 4-3/4″
  • Basic White Cardstock Scrap for Labels

I hope you enjoyed my project. I’d love to be your Stampin’ Up!® Demonstrator! All the Stampin’ Up! supplies used to make my card are available in my online store. Simply click any of the product photos below!

Happy Stamping!

Speedy Recovery – Luv 2 Stamp Group Blog Hop Read More »

You Are Wonderful with Happiness Abounds

Does my card look familiar? I CASED a card in the Stampin’ Up! Annual Catalog for inspiration and slightly changed the label. Case-ing means Copy And Share Everything, and is a great source for inspiration. The cards made with the Hues of Happiness Suite catch my eye every time I’m looking through the catalog. This pretty card was quick to make and is perfect for any occasion.

I started with a piece of Fresh Freesia card stock for the card base. I trimmed and adhered a piece of the Hues of Happiness DSP to add to the base.

Using Stylish Shapes dies I die cut a Granny Apple Green Label. Then I cut a piece of the Hues of Happiness DSP to 3/4’x 3″ and punched one end with the Banners Pick A Punch and adhered it to the Granny Apple Green label. I trimmed the end of the Granny Apple Green Label so it would be flush with the end of the card. Then I cut a piece of Basic White Cardstock to 3/4″ x 2-1/4″ and stamped the sentiment in Gorgeous Grape and adhered it to the label.

I used Stampin’ Dimensionals to add the label to the card. I added a little sparkle with a few Gorgeous Grape Glassy Dots to finish my card.

Hues of Happiness You Are Wonderful Card Measurements:

  • Fresh Freesia Card base: 5-1/2″ x 8-1/2″, score at 4-1/4″
  • Hues of Happiness DSP: 3-3/4″ x 5-1/2″
  • Hues of Happiness DSP Strip for Label: 3/4″ x 3″
  • Basic White Cardstock for Label: 3/4″x 2-1/4″

I’d love to be your Stampin’ Up!® Demonstrator. All the Stampin’ Up! supplies used to make my card are available in my online store. Simply click any of the product photos below!

Happy Stamping!

You Are Wonderful with Happiness Abounds Read More »

A Cup of Tea with Glimmer

The Cup of Tea Bundle is one of my favorite Bundles n the new Annual Catalog! As a lover of Tea this was at the top of my shopping list!

My card also features the 2022-2024 In Color 6’x6″ Glimmer Paper. If you haven’t tried it, Glimmer Paper is amazing! I love the shimmer it adds to my projects and its mess free! No traces of glitter all over my craft room!

To create this card I cut (2) 1/2″x 5-1/2″ strips of Starry Sky Glimmer Paper, and (2) 1/2″x5-1/2″ Parakeet Party Glimmer Paper. I adhered them to the Basic White cardbase with Multipurpose Liquid Glue.

I die cut a stitched circle in Vellum with the Stylish Shapes Dies. Using Tear & Tape I added a strip of White glittered Organdy Ribbon. I added another strip of Tear & Tape over the ribbon to add it to my cardbase.

Then using an Adhesive Sheet added to the back of some Parakeet Party Glimmer Paper, I die cut the leaf tea cup. I die cut the sold Tea Cup in Starry Sky Glimmer Paper. This made adding the Parakeet Party Tea Cup to the Starry Sky tea cup super quick and easy. I attached the tea cup to the Vellum Circle with Foam Adhesive Sheet cut to fit the cup.

To finish my card, I stamped 2 tea tags in Starry Sky and Parakeet Party and die cut them. I tied some Basic White Bakers Twine to my card and left 2 long tales at the top. Using Glue dots I attached the tags to them. I added these cute die cut hearts to the back of the tags with another glue dot.

Cup of Tea with Glimmer Card Measurements:

  • Basic White Thick Cardstock Base: 5-1/2″ x 8-1/2″, score in half at 4-1/4″
  • Starry Sky Glimmer Paper Strip: (2) 1/2″ x 5-1/2″
  • Parakeet Party Glimmer Paper Strip: (2) 1/2″ x 5-1/2″

I’d love to be your Stampin’ Up!® Demonstrator. All the Stampin’ Up! supplies used to make my card are available in my online store. Simply click any of the product photos below!

Happy Stamping!

A Cup of Tea with Glimmer Read More »

Fun with Lighthearted Lines

I’ve had the Lighthearted Lines stamp set sitting on my stamp shelf for almost a year. it was high time I made some cards with this fun stamp set. The Sweet Symmetry DSP with its bright pretty colors is the perfect fun choice to go with the sentiments in the Lighthearted Lines stamp set.

Using the Basic Border Dies, I die cut multiple pieces of the Dsp. Selecting the patterns to mix and match was lots of fun. Once I had them adhered together I trimmed them down to fit the card bases.

To make this sentiment just a bit more fun, I wanted to easily stamp “Forever” inside on this card. I snipped apart the bottom half of this sentiment, now I can easily use a few of the words individually. I stamped the sentiment in Flirty Flamingo on Basic White. I die cut the sentiment for the front of my card using the Stitched So Sweetly Dies and adhered it to a Night of Navy label. Foam adhesive sheets are fast becoming my new favorite adhesive to give my cards dimension. I love that I can quickly cut them to fit and give just a bit more stability.

I used a number of dies to create all the different labels for my cards. The finishing touch on these bright color cards are the Brushed Brass Butterflies. I had a lot of fun putting these cards together.

You’re Stuck With Me Card Measurements

  • Bumblebee Cardstock Base: 5-1/2″ x 8-1/2″, score in half at 4-1/4″
  • Sweet Symmetry DSP: 6′ x6′, then trimmed to fit card front

I hope you found some inspiration from these fun cards. All the Stampin’ Up! supplies used to make my card are available in my online store. Simply click any of the product photos below!

Product List

Happy Stamping!

Fun with Lighthearted Lines Read More »

March Customer Thank You Cards

This month my Customer Thank You Cards are inspired by the Annual Catalog. If you are ever looking for inspiration the Annual Catalog is a great place to start, it’s a treasure trove of amazing creations. I took the inspiration from page 68, the Simply Elegant Suite card. I love the elements in this card, it showcases Designer Series Paper and stamping directly on to the cardstock card base.

To make my card I started with stamping the beautiful swirl from the Sentimental Swirl stamp set on the left side of the cardbase. I love stamping tone on tone, it really makes the already pretty colors so much richer. I also stamped some of the swirls on the inside of my cards.

Next, I cut strips of the Abstract Beauty DSP and Gold Foil paper. I adhered the DSP to the Gold Foil Strip, then using Multipurpose Liquid Glue, added them to the right side of the card base.

I stamped the sentiment from the Flowering Tulips stamp set in Magenta Madness on the label. Before adding the label to my card, I adhered a gold foil element from the Expressions in Ink Ephemera Pack to the back of the lable with some Stampin’ Seal. I cut a piece of Foam Adhesive sheet which I added to the back of the label over the Gold Foil element. Doing this keeps the Gold Foil element lifted off the card but firmly in place on the back of the label.

I wanted to use all the 2020-2022 In Colors and the Abstract Beauty DSP was perfect to pair with these pretty colors. Once I started taking photos of my cards, I had some inspiration to add just a touch of bling, I brushed a little Wink of Stella on the swirls. I love the look, but it was hard to photograph.

Just Thinking of You Today Card Measurements:

  • Cardbase: 5-1/2″ x 8-1/2″, score in half at 4-1/4″
  • Abstract Beauty DSP: 1-1/2″ x 5-1/2″
  • Gold Foil: 3/4″ x 5-1/2″

I’d love to be your Stampin’ Up!® Demonstrator. All the Stampin’ Up! supplies used to make my card are available in my online store. Simply click any of the product photos below!

Product List

Happy Stamping!

March Customer Thank You Cards Read More »

Scroll to Top